
Should I Download Fortnite on My Mac
About Fortnite on Mac
Fortnite is a costless-to play multiplayer game that can be played natively on Mac computers. Fortnite is currently amidst the about popular computer games out there, and yous can easily play it on your Mac and then long as the computer meets the game's hardware requirements.
Unless you lot have been living under a stone for the past four or so years, chances are you've heard about Fortnite – an online action video game that comes in three distinct gameplay modes, each with a different objective but shared gameplay mechanics. The game is developed by Epic Games and was released in 2017 to quickly go one of the near popular multiplayer games. Its player base in 2020 reached 350,000,000 registered accounts and that number has most certainly increased with at least another 50,000,000 accounts since then. The game's peak player activity reached 12,iii meg players logged into the game at one time in 2020.

Plain, the game is immensely pop and would go on to be that way for the foreseeable future, but does this mean information technology'southward a expert game worth playing? Well, in that location may non really be a definitive and clear-cut respond to that question – afterward all, gaming is all about personal feel and the private's perception of a given game. That said, as popular equally Fortnite is, it certainly has its flaws and, in fact, the user score for the game on Metacritic clearly reflects that with the very low score of 3.0/10. At the same fourth dimension, still, Fortnite is has received a relatively high rating from critics – 81/100, and so what gives?
Well, let'due south talk near the game itself for a bit to try to figure that out. Equally said, Fortnite is a free-to-play multiplayer game. Its most popular mode, Battle Royale, puts the player and a set number of other players (up to 100 players) in a large battle arena, with the goal of each thespian, player due, or player squad being to be the concluding one standing. At the beginning of each game, the players/duos/squads kickoff far apart from one another and the twist is that the arena gradually shrinks, forcing the players to close the distance between themselves and other players and engage in skirmishes.
Editors' Choice: Play Genshin Impact on Mac
Boxing Royale mode
The Battle Royale manner for Fortnite wasn't initially planned to be office of the game, only two months prior to Fortnite's release, PUBG (another popular multiplayer get-go-person/third-person action game) was released, and it used the Boxing Royale mechanic as the ground of its gameplay. As presently as PUBG got released, its gained immense popularity due to its Battle Royale-based gameplay. The developers of Fortnite figured out that they tin expand their original vision of the game to include a similar way, and thus the Boxing Royale Fortnite mode got created and was readily available in one case the game was released. As was expected, this mode of Fortnite went on to become the most popular of the three.
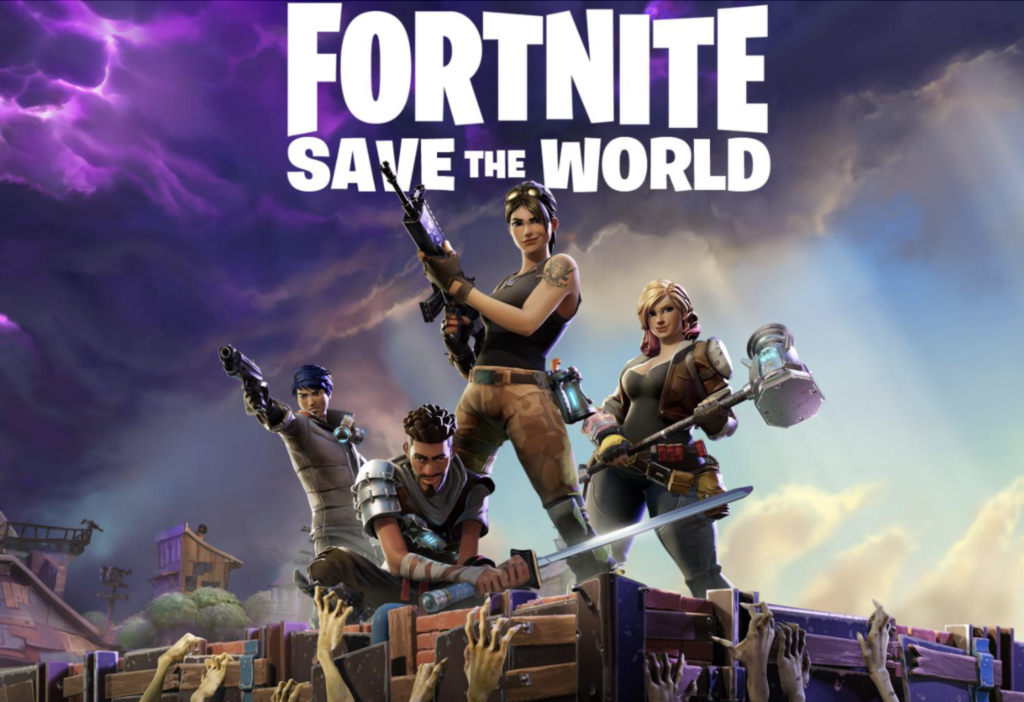
Fortnite: Salve the World
The mode intended every bit the game's master one, is called Save the World, and information technology focuses on teamwork. The players are all on the same team and must survive incoming waves of zombie-like creatures. In this mode, the players can gather resources from the map and build fortifications that help them survive the waves of attackers that gradually increase in forcefulness and size. This game fashion is alike to other zombie-survival games, but the cartoonish graphics of Fortnite, in general, give this style a more calorie-free-hearted and less serious experience compared to other games that focus on surviving waves of zombies.
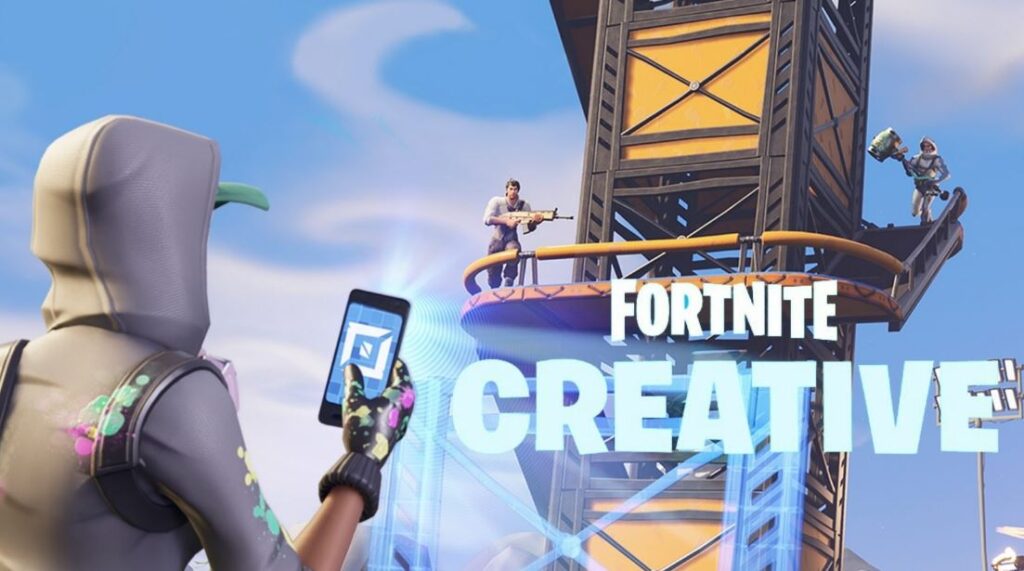
Fortnite Artistic
Unlike the other two, in it, in that location isn't a specified objective that the thespian must consummate. This game mode has sandbox-type of gameplay, reminiscent of games like Minecraft or the Half-Life 2 Garry'due south Manner. The player is given the freedom to build annihilation that the game'due south engine tin can support, and thus create custom battle arenas, race tracks, platforming courses, and other mini-games.
The expert
Now that we've covered the three base of operations modes of Fortnite, we can talk a bit virtually the things that make this game equally popular equally it is.
The offset aspect of Fortnite that contributes to its immense popularity is the appeal of the Battle Royale gameplay style and the huge number of players that this game mode of Fortnite can suit at any given fourth dimension. Games that take Battle Royale-based gameplay are popular for a reason – the game style is fun and was relatively unexplored before PUBG and Fortnite came along. The steady and exponential build-upwards of force per unit area, risk, excitement, and adrenaline caused by the gradually shrinking map makes for interesting in-game situations and adds a level of urgency that more conventional types of gameplay in action games lack.
Some other important point to be made nigh Fortnite is its ever-evolving gameplay. The game-as-a-service model has been on the rise ever since games like League of Legends and Dota 2 got released about a decade ago, and Fortnite is currently one of the most notable examples of this model. Innovations, balance changes, new gimmicks, and improvements are made to the game on a monthly basis, ensuring that the gameplay experience doesn't become dried and that there'southward e'er new content to explore and play around with.
The bad
While, at its core, Fortnite is a solid multiplayer game that has a lot to offer to fans of the shooter and battle royale gaming genres, in that location are also sure bug and controversies surrounding the concern model of Fornite that shouldn't disregarded.
It's no secret that a very large portion of the histrion base of Fortnite consists of minors – children who shouldn't be able to purchase stuff on the Internet without their parents' knowledge and consent. In the case of Fortnite, nevertheless, it seems that the game makes information technology a bit too easy and tempting for a minor to buy an in-game item with real-life money. Questionable business practices and advertising that targets that specific demographic of younger and, thus, more gullible people, is i of the red flags that Fortnite has. Of form, parents who cannot control their children and overlook their Internet habits are also to blame, merely having a highly-addictive game that makes it all too easy for a kid to utilize real-life money to purchase stuff on the Internet doesn't make things whatsoever easier. Indeed, there has even been a grade-activeness lawsuit against Ballsy Games for those exact reasons, in which the visitor decided to settle and give ane,000 V-Bucks to anyone who meets the class-activity lawsuit weather.
Again, none of this has any pregnant reflection on the gameplay of Fortnite – as a game, Fortnite is solid – but it was nevertheless necessary to mention some of the controversies that surround its business model.
How to play Fortnite on Mac M1
To play Fortnite on Mac M1, you must only go to the Ballsy Games site, download the game from at that place, and install it. If yous don't already take one, yous'd need to create an Epic Games account to download and play Fortnite on Mac M1.
Information technology may be hard to run certain games on Mac M1 models due to the different architecture of the M1 fleck compared to Intel processors, only no such issues are present when it comes to Fortnite. The Mac version of the game is perfectly playable on a Mac M1 models, and it's very easy to commencement playing it. All you need to do is download the game from the Ballsy Store site (click the Download push in the tiptop-right when you open the link), then execute the downloaded file and perform the installation by dragging the Fortnite icon to the icon of your Applications folder (just like when installing whatever other app). In one case the installation is complete, yous can get-go playing. Obviously, if y'all don't already accept an business relationship for the game, you will first need to create ane, but this takes but a couple of minutes.
Update on Fortnite playability on Mac: Due to a lawsuit between Apple and Epic Games, equally of August 2020, Fortnite has stopped existence officially available for Mac systems. This means that Mac users who want to play Fortnite would need to resort to alternative methods – you can observe a number of such methods on this page, the first ane of which is to play Fortnite using Parallels.
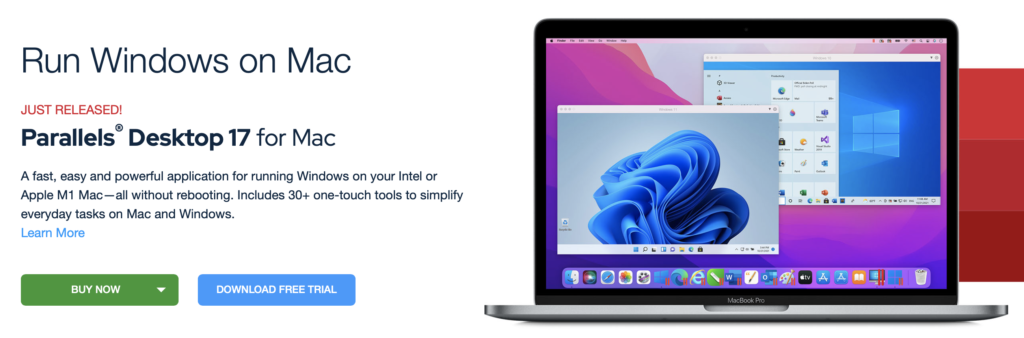
Play Fortnite using Parallels
Parallels is a program that lets you create a virtual Windows 10/11 machine in your Mac's macOS. When you are using the virtual machine (VM), it would be as if your Mac is running on Windows, all the while your macOS would withal be running in the background. This is a quick and like shooting fish in a barrel way to get Windows on your Mac and use it to download and play Windows games, including the Windows version of Fortnite.
- Information technology must be noted that, as is oftentimes the example, Parallels works better on more powerful Macs. Since, when the VM is existence used, your Mac would be running both macOS and Windows at the same fourth dimension, the figurer's hardware resources such equally RAM and CPU cores would demand to be shared by the two operating systems, and the VM wouldn't be able to employ all of the Mac's resources, which, in turn, would bear on gaming performance.
If you are interested in trying Parallels, nosotros will evidence you beneath how to install it and create a Windows VM on your Mac, so that y'all can then utilise the virtual machine for playing Fortnite. Parallels offers provides its potential new customers with a xiv-mean solar day free trial that we recommend using to test the service and its performance on your Mac.
Tutorial Overview
- Getting Parallels
- Downloading a Windows installation file
- Installing the Parallels VM
- Final Preparations
- To install Parallels and create a Parallels virtual auto, you lot must first go to the progam'south site and download it from there. Again, nosotros recommend opting for the 14-day trial version.
- Once yous download the Parallels installation .dmg file, double-click it and then double-click on Install Parallels Desktop.

- If your Mac asks you for confirmation, click Open, wait for Parallels to download its needed data, and then enter your admin password if prompted to.
- If yous are using the trial version, select Keep Trial when asked if you want to upgrade to the paid version, and then accept the terms of use/license agreement.
- Adjacent, click OK on each of the permission prompts that Parallels shows yous.
- Follow whatever prompts remain until you get to a screen with the Install Windows or another Os from a DVD or epitome file option, and in one case you practice, select that selection and click Continue.
- For Intel Mac users: When Parallels shows you a screen with the option to automatically install Windows 10, select Skip.
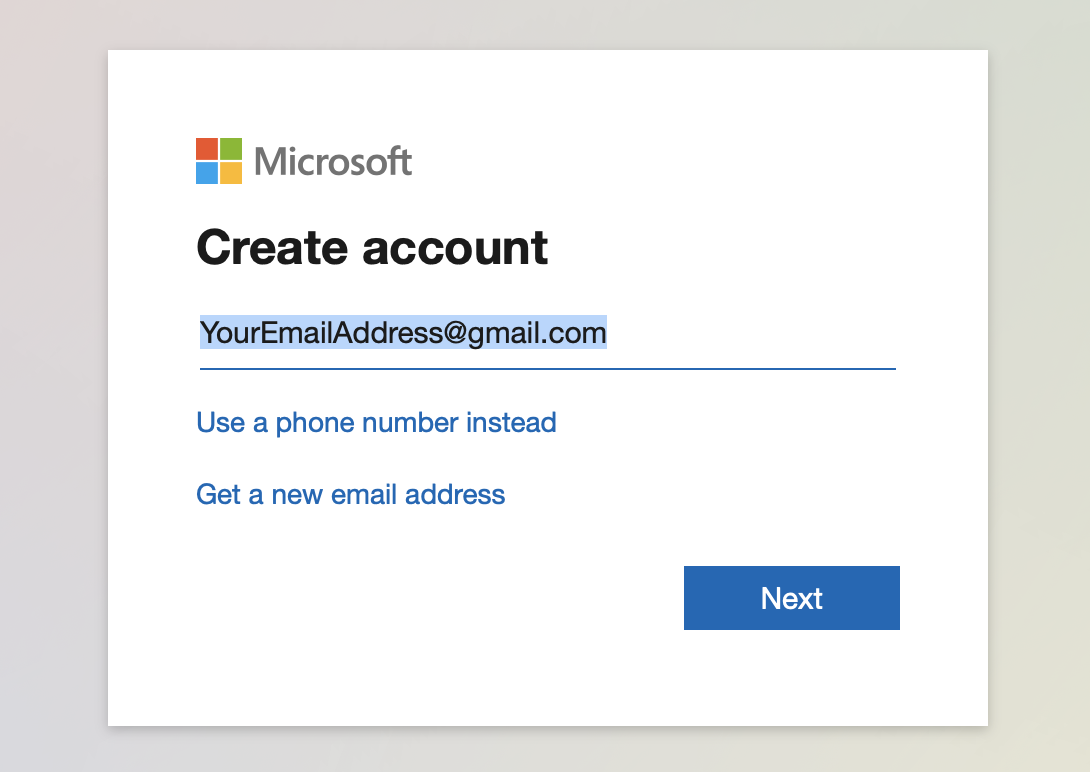
- At present, without closing Parallels, get here, click Register, employ your Microsoft account to sign in, select Register one more time, and then click on Flying At present.

- If yous don't have a Microsoft account, create ane from here.
- For Intel Mac users, instead of registering on the Windows Insider Programme page, become to this Microsoft page, download the 64-bit Windows 10 ISO file, and skip Step eight.
- If yous don't have a Microsoft account, create ane from here.
- Next, go to this folio and download the ARM 64 file shown on information technology. If you don't see a download link, it means y'all aren't logged in with your Microsoft account, and so click the Sign in button in the top-right and enter your details.
- After the ARM file (or ISO file for Intel Mac users) is downloaded, double-click it, and Parallels should detect it and give you two options for the virtual motorcar installation (Productivity and Gaming).
- Selection the Gaming pick, select Continue, check the Customization option, and click on Create.
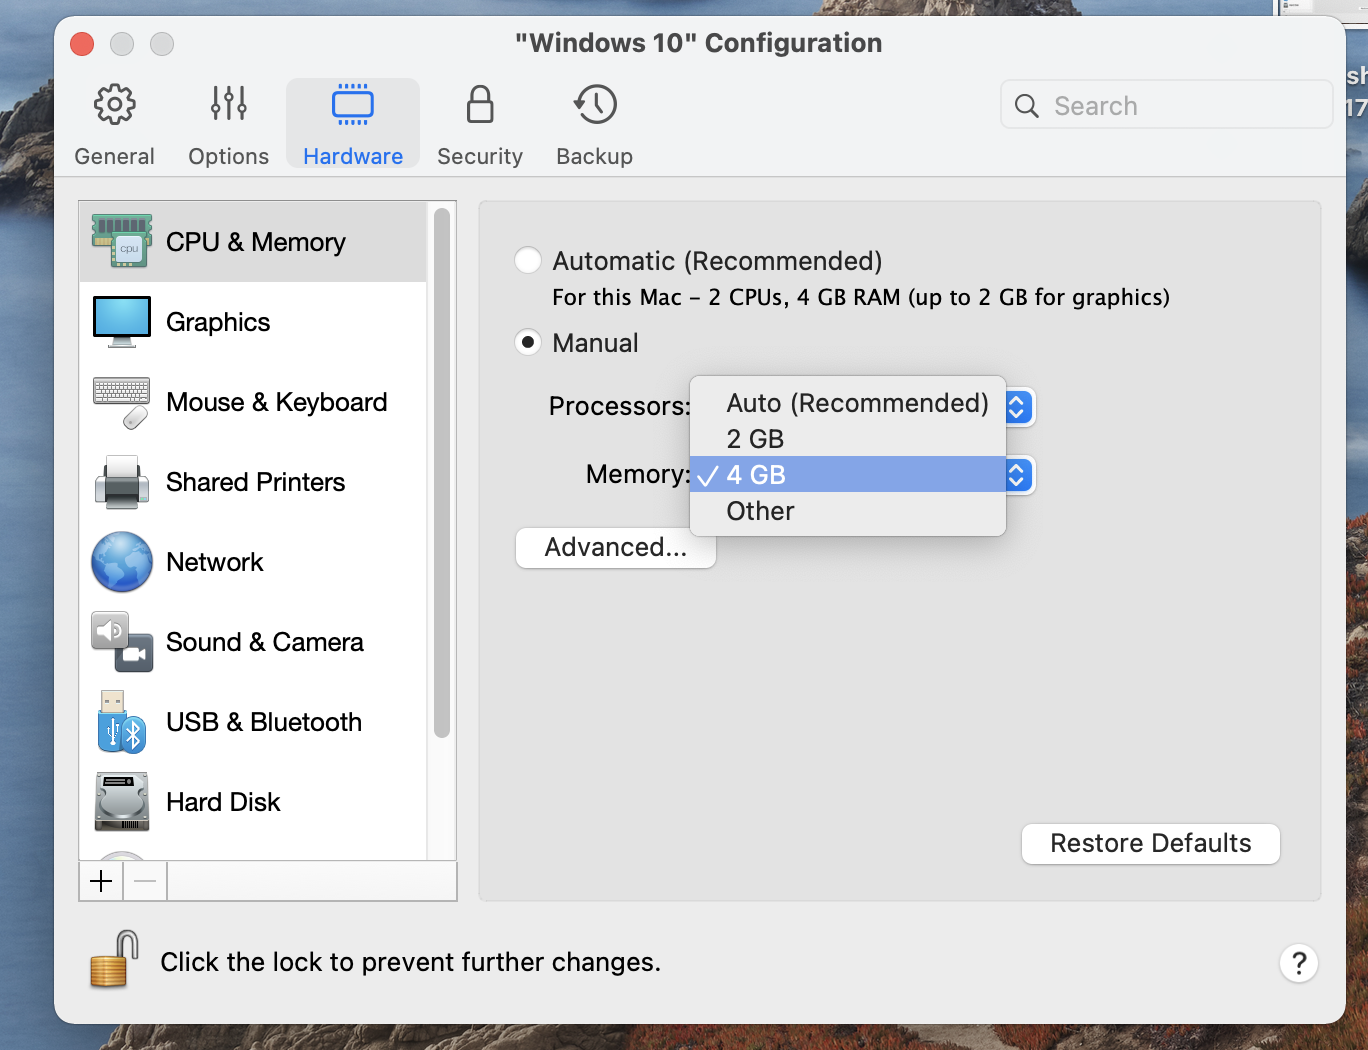
- When shown the Configuration/Customization screen, go to the Hardware section, click CPU & Retention from the side, and unlock the settings on this page if they are currently locked.
- Select the Manual pick and then alter the CPU and Memory values to whatever is the maximum allowed value.
- Shut the Configuration section, click Create, and let the installation commence. When prompted for a permission, click OK and wait for the installation to complete.
- Once the VM is created, y'all must create a Parallels account, log in with it, and the Windows 11 (x for Intel Macs) virtual auto will start on your screen.
- In the VM, select the Kickoff Carte du jour, become to Settings/Updates & Security/Windows Update and if there you lot see whatever pending updates, install them and after that restart Windows from the Start Menu.
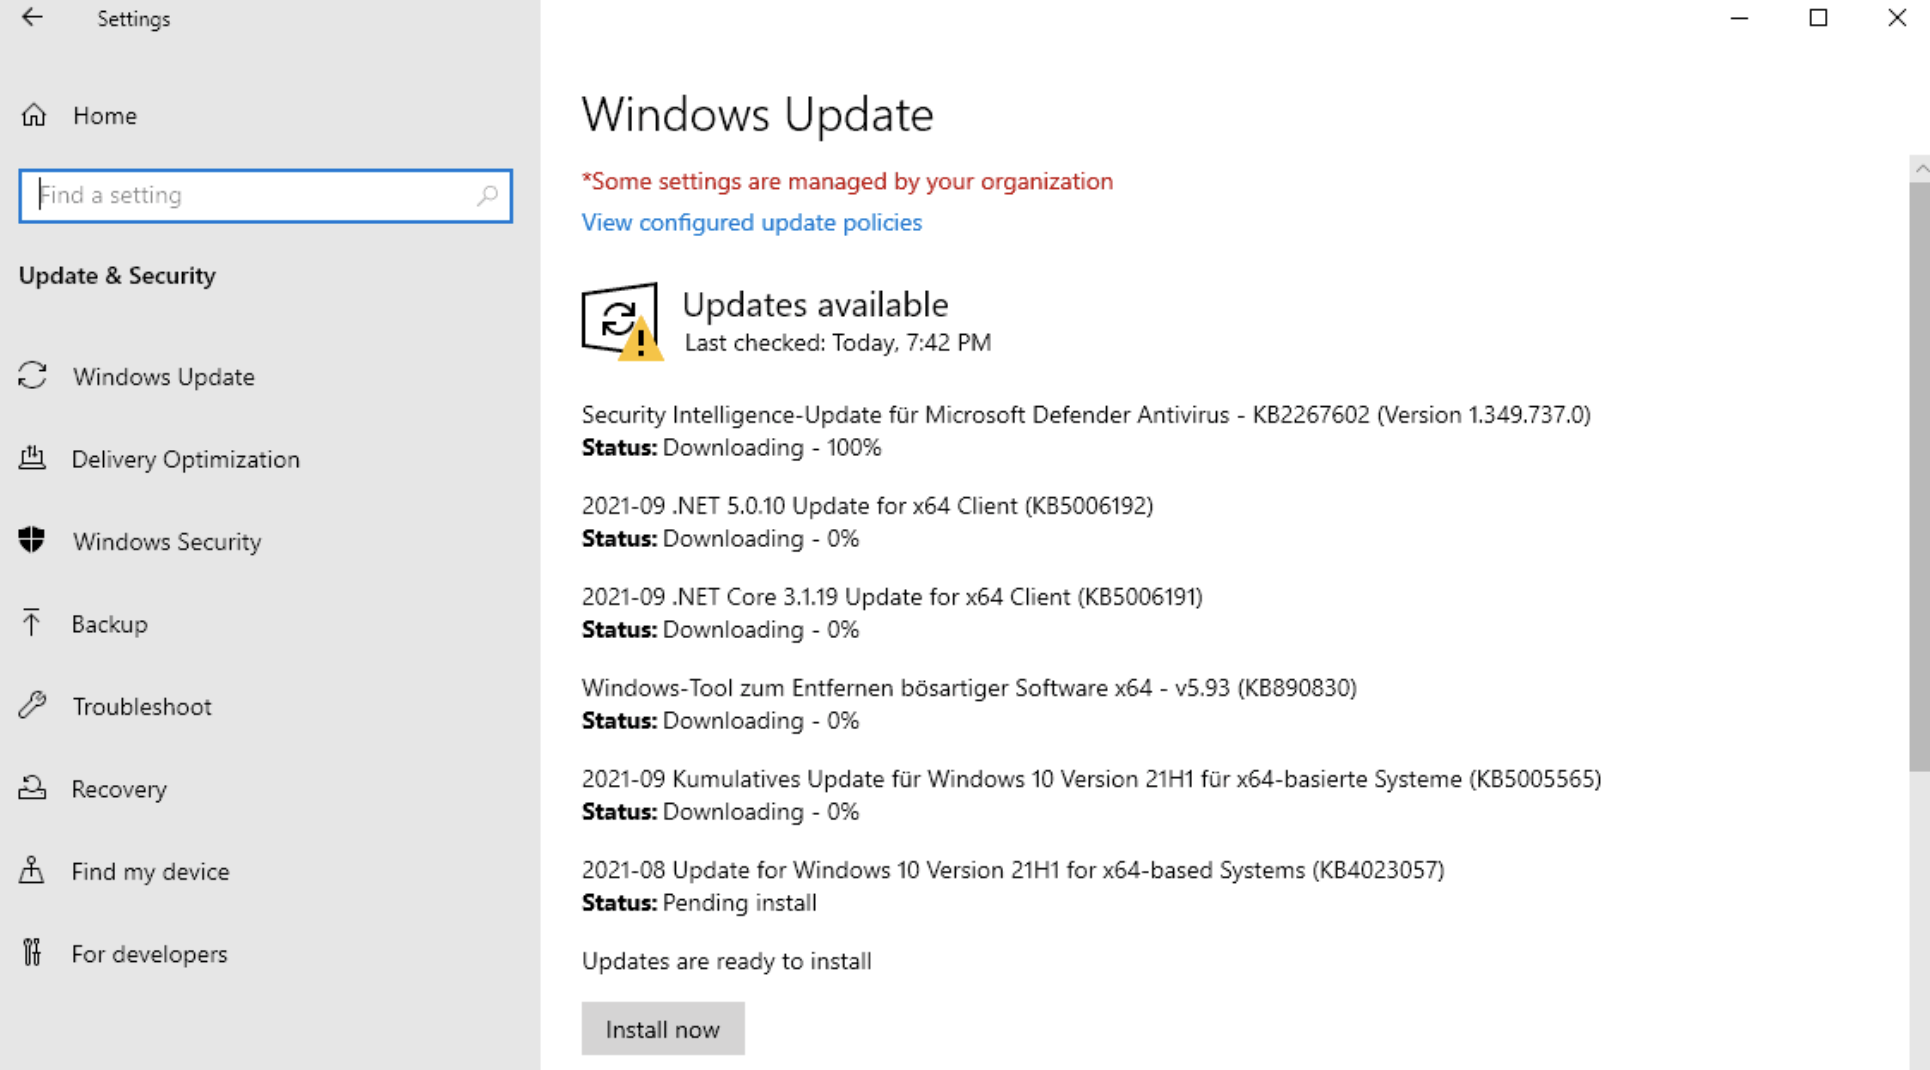
- It'south possible that the VM starts the installation of the Windows updates automatically the showtime fourth dimension it is started.
- When Windows restarts, Parallels automatically outset installing some tools for the VM – permit information technology finish this process, restart Windows again, and the virtual automobile should be prepare for gaming.
How to play Fortnite on Mac with Cloud Gaming
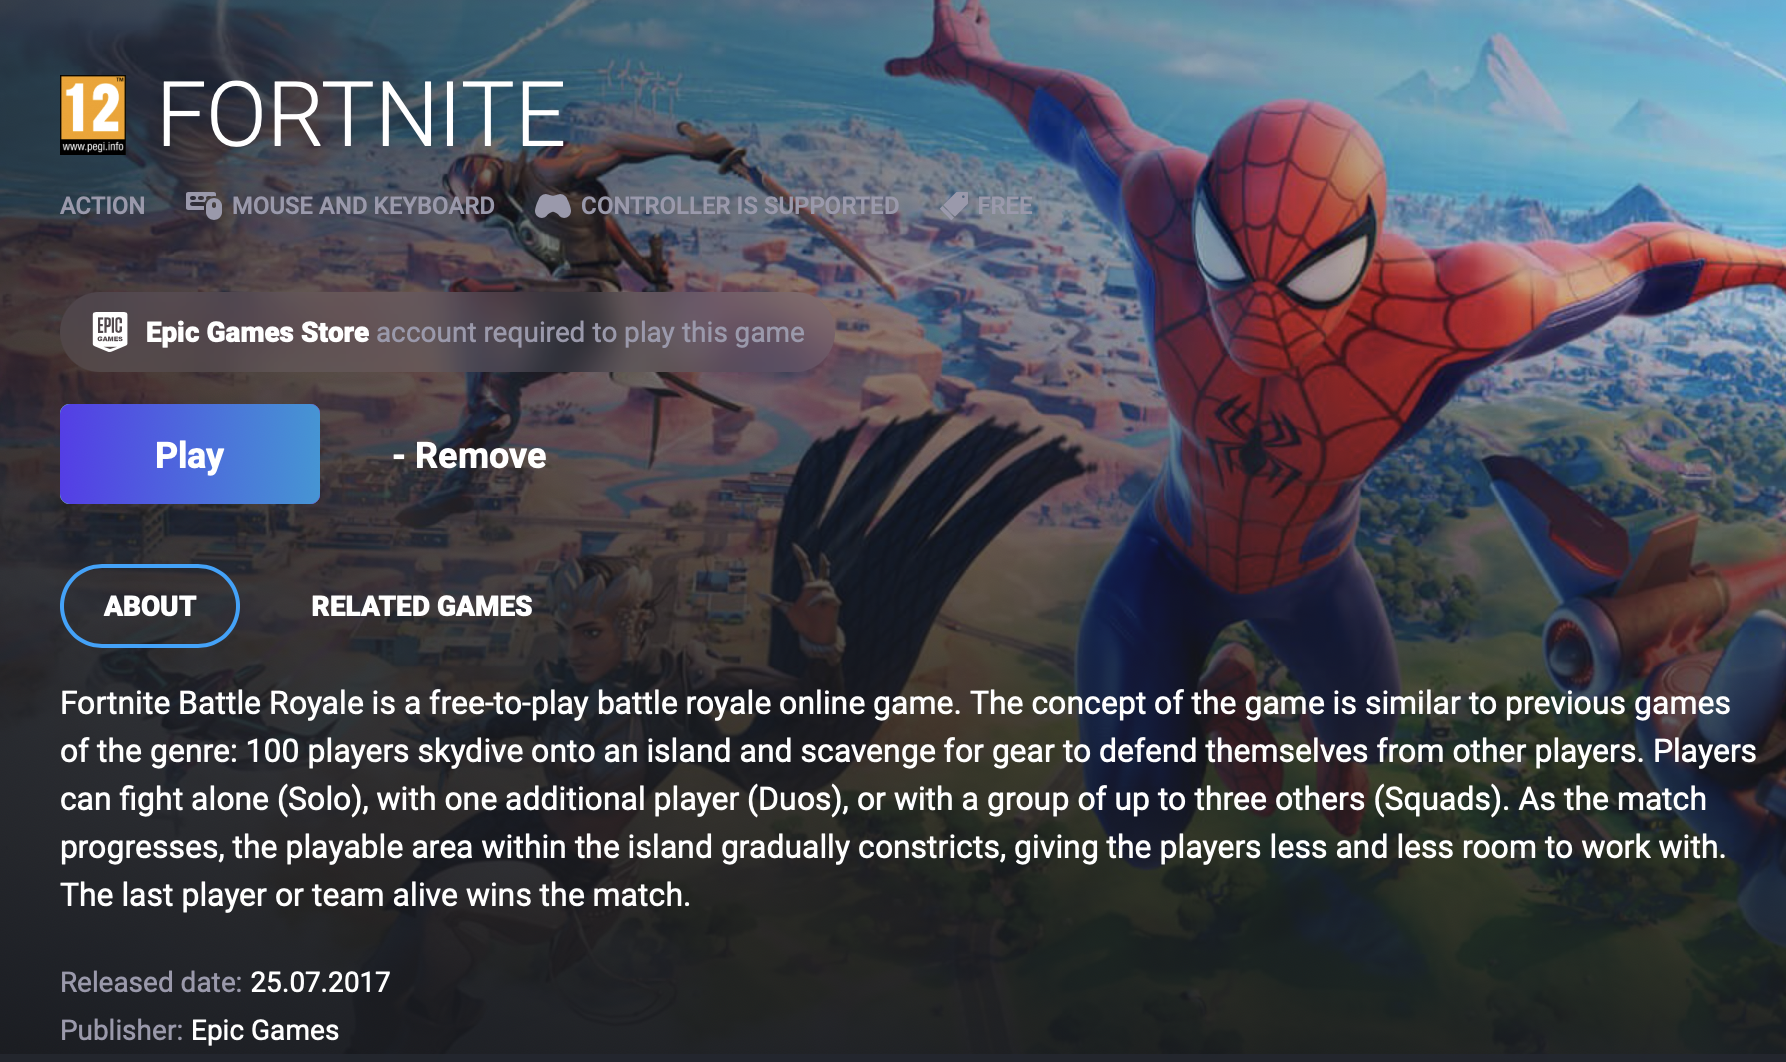
To play Fortnite on Mac, you must download the game from the Epic Games site and install it on your Mac like any other regular app. Some other feasible method to play Fortnite on Mac is to use the GeForce cloud gaming service.
Playing Fortnite on Macs with Intel processors is exactly the same as playing the game on M1 Macs. You just download it from Ballsy Games, install it, and offset playing. However, if yous own an older Mac model that maybe doesn't run across all of the arrangement requirements for Fortnite, but yous still want to play the game without ownership a new automobile for this specific purpose, it may actually exist possible to still play Fortnite on your current Mac via a workaround method.
UPDATE: As of August 2020, Fortnite stopped being supported for macOS, meaning that Mac users can no longer play the game natively on their Macs. This means that workaround methods must be implemented if y'all want to be able to run the game on your Mac computer. One such viable method that can allow you to play Fortnite on a Mac is to use a cloud gaming service. Currently, Fortnite is available on Boosteroid and GeForce Now – two deject gaming services that could let you play Fortnite despite it non having a macOS version. Below, we've provided instructions on how to set and use Boosteroid and GeForce Now.
Fortnite Set Upward Methods
| Methods | Advantage | Disadvantage |
| Deject Gaming | – No set-up required – Annals and Play – Admission to a Library of over 70 top-rated free Games – Smoothen performance – Uniform with M1 and Intel Macs | – Monthly Fee – Requires Decent Internet Connection – No Free Trial |
| BootCamp | – Free to use whatsoever fourth dimension – Windows 10 Environment | – Painful Setup – Mediocre Performance – Only Compatible with Intel Macs |
| Parallels Virtual Machine | – Like shooting fish in a barrel Ready-up – Adequate Operation – Play well-nigh whatsoever PC game – Windows 11 environment – Compatible with M1 and Intel Macs – 14-twenty-four hour period free trial | – Yearly Fee |
Fortnite with Deject Gaming
Fortnite is at present available to play on cloud gaming servers. This assures NO
compatibility bug while playing on your Mac as well as top-notch functioning.
Step one. Get Fortnite
Before playing Fortnite make sure you register for gratis through the official Epic Games website. Once registered you volition be able to play with cloud gaming services such equally Boosteriod and Geforce.
Pace 2. Annals and Add Fortnite To Boosteroid Cloud Gaming Library
All you need to practice now is register for Boosteroid. This allows you to add Fortnite to their Cloud Gaming Library. One time uploaded yous can seamlessly play the game from your Mac, Boob tube or Mobile Device.
When Registered yous will have additional admission to more than 70 top-rated games for free. Pricing varies depending on the subscription program.
How to use Boosteroid to play Fortnite on Mac
Boosteroid is a cloud-based gaming service that basically allows you to remotely play whatever game included in its library. When playing a game over Booesteroid, the game is technically running on a very powerful machine and with the gameplay being streamed to your figurer. From your Mac, you'd have full command of what happens in the game, simply the game itself won't be running on your auto, but rather on one of the Boosteroid gaming rigs. Using such a deject gaming service is perfect for playing demanding games that your motorcar cannot run, and/or for playing games on Mac computers that don't take versions for macOS. Here's a brief explanation of how to fix upwardly and use Boosteroid to play Fortnite on your Mac.
- First, you demand to have an Epic Games account to be able to play Fortnite, and then go hither to create one.
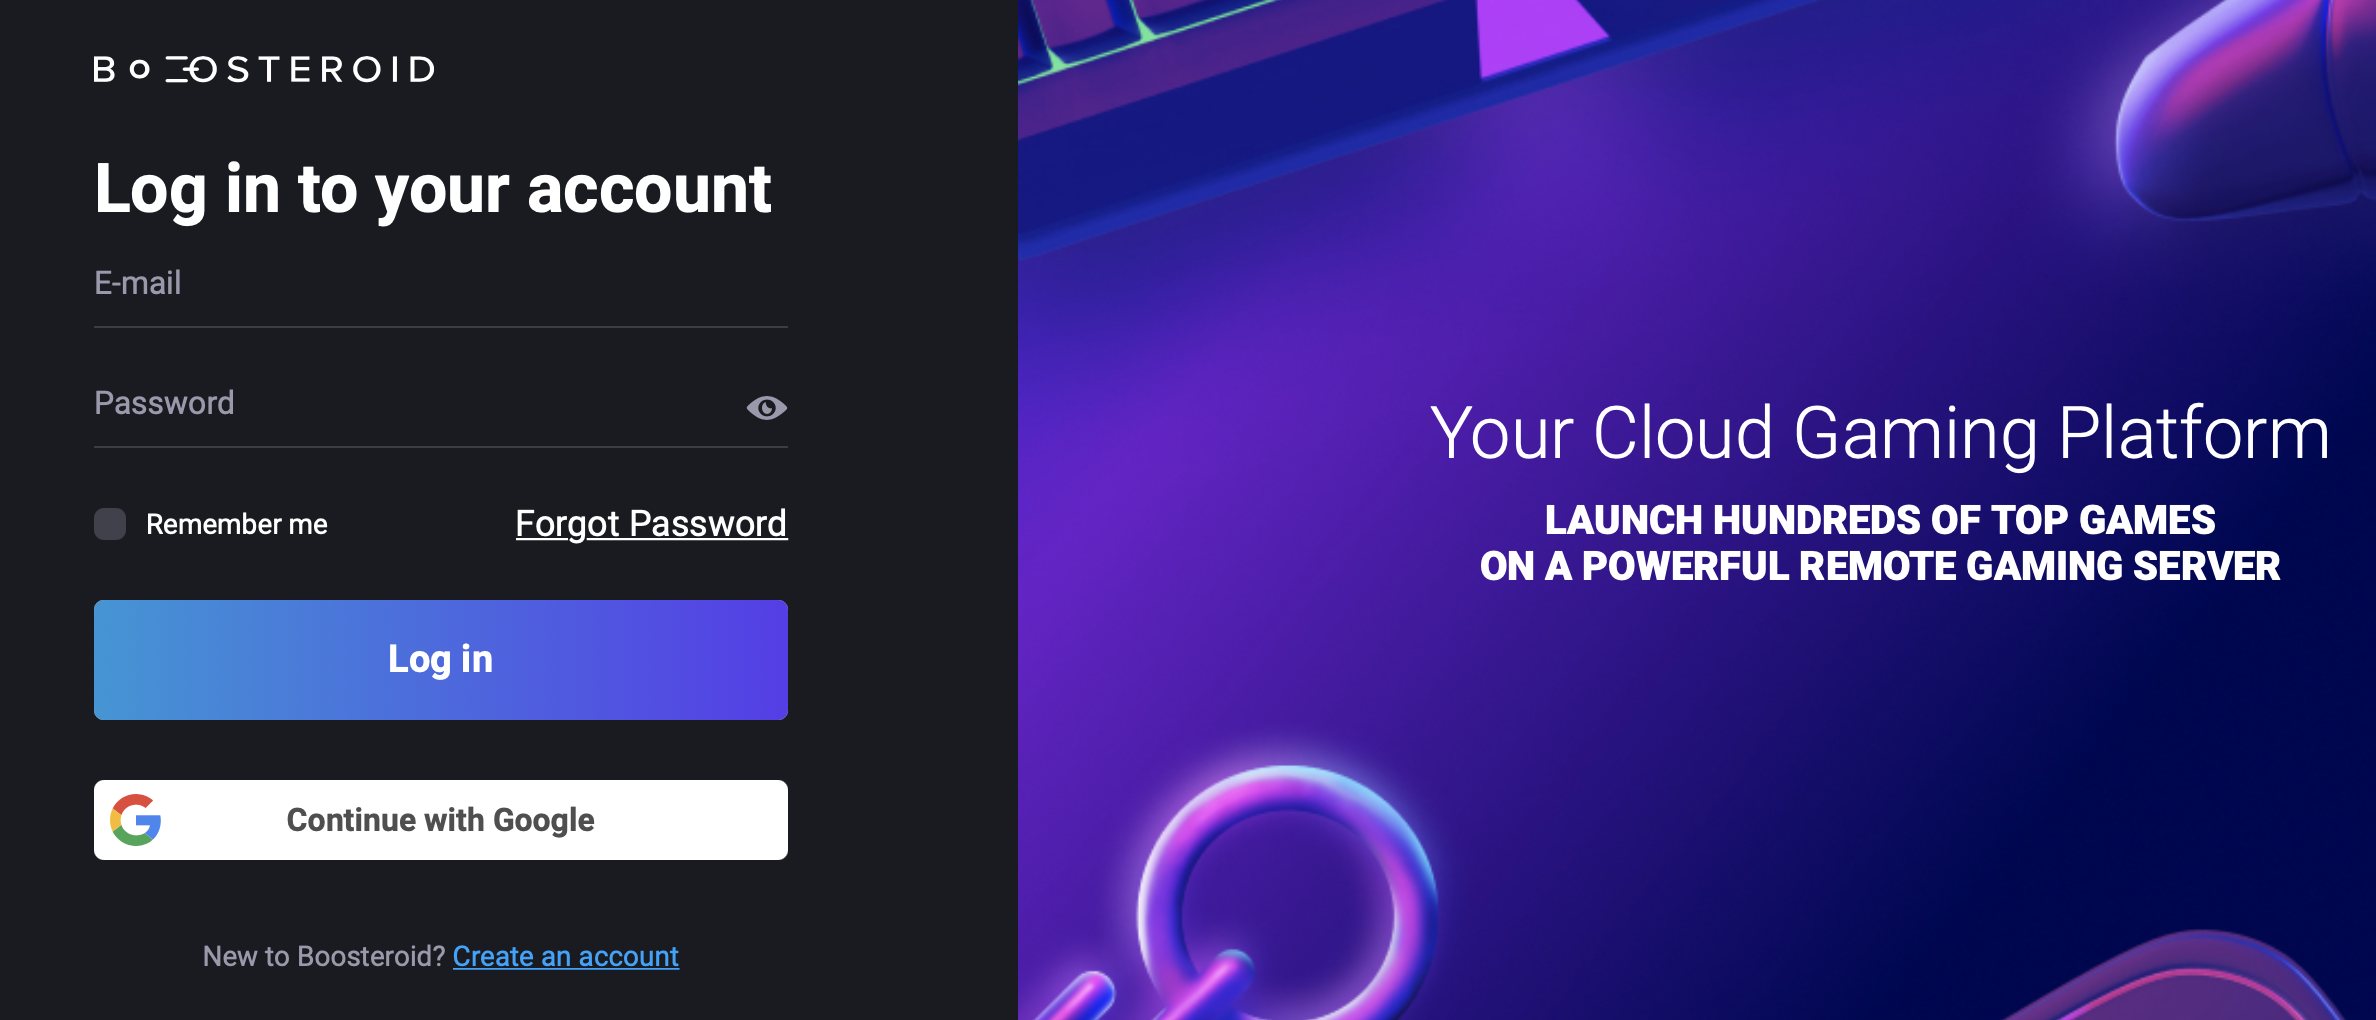
- Next, go to the Boosteroid site and create a new account there.
- After that, enter your Boosteroid business relationship, click the search icon from the pinnacle, and search for Fortnite.

- Click on Fortnite when information technology shows up and select Play on the game'south page.
- Click on OK, Let'south Go when you go told that you lot will need to sign in to your Epic Games business relationship.
- Next, enter your Epic Games business relationship credentials and sign in. Later that, the game should start, and you can begin playing.
How to use GeForce Now to play Fortnite on Mac
Note: Although the system requirements for using GeForce At present to play games are significantly lower compared to those of Fortnite, your Mac nonetheless needs to run across them, then make certain to cheque whether it does before you endeavor to use the service. Co-ordinate to the official Nvidia website, whatever Mac released in 2009 or later should be able to run GeForce Now with up to 1080p and lx FPS.
- Go to Nvidia GeForce Now site , click on Play Now, and choose the subscription plan you prefer (Free or Priority).
- If you lot have an Nvidia account, log in to it. If y'all don't have an account, create ane now.
- If you lot are creating a new account, once it is created, you will need to verify your email, and and then go dorsum to the GeForce At present site and select Play Now over again. After that, you will need to log in with your newly created account.
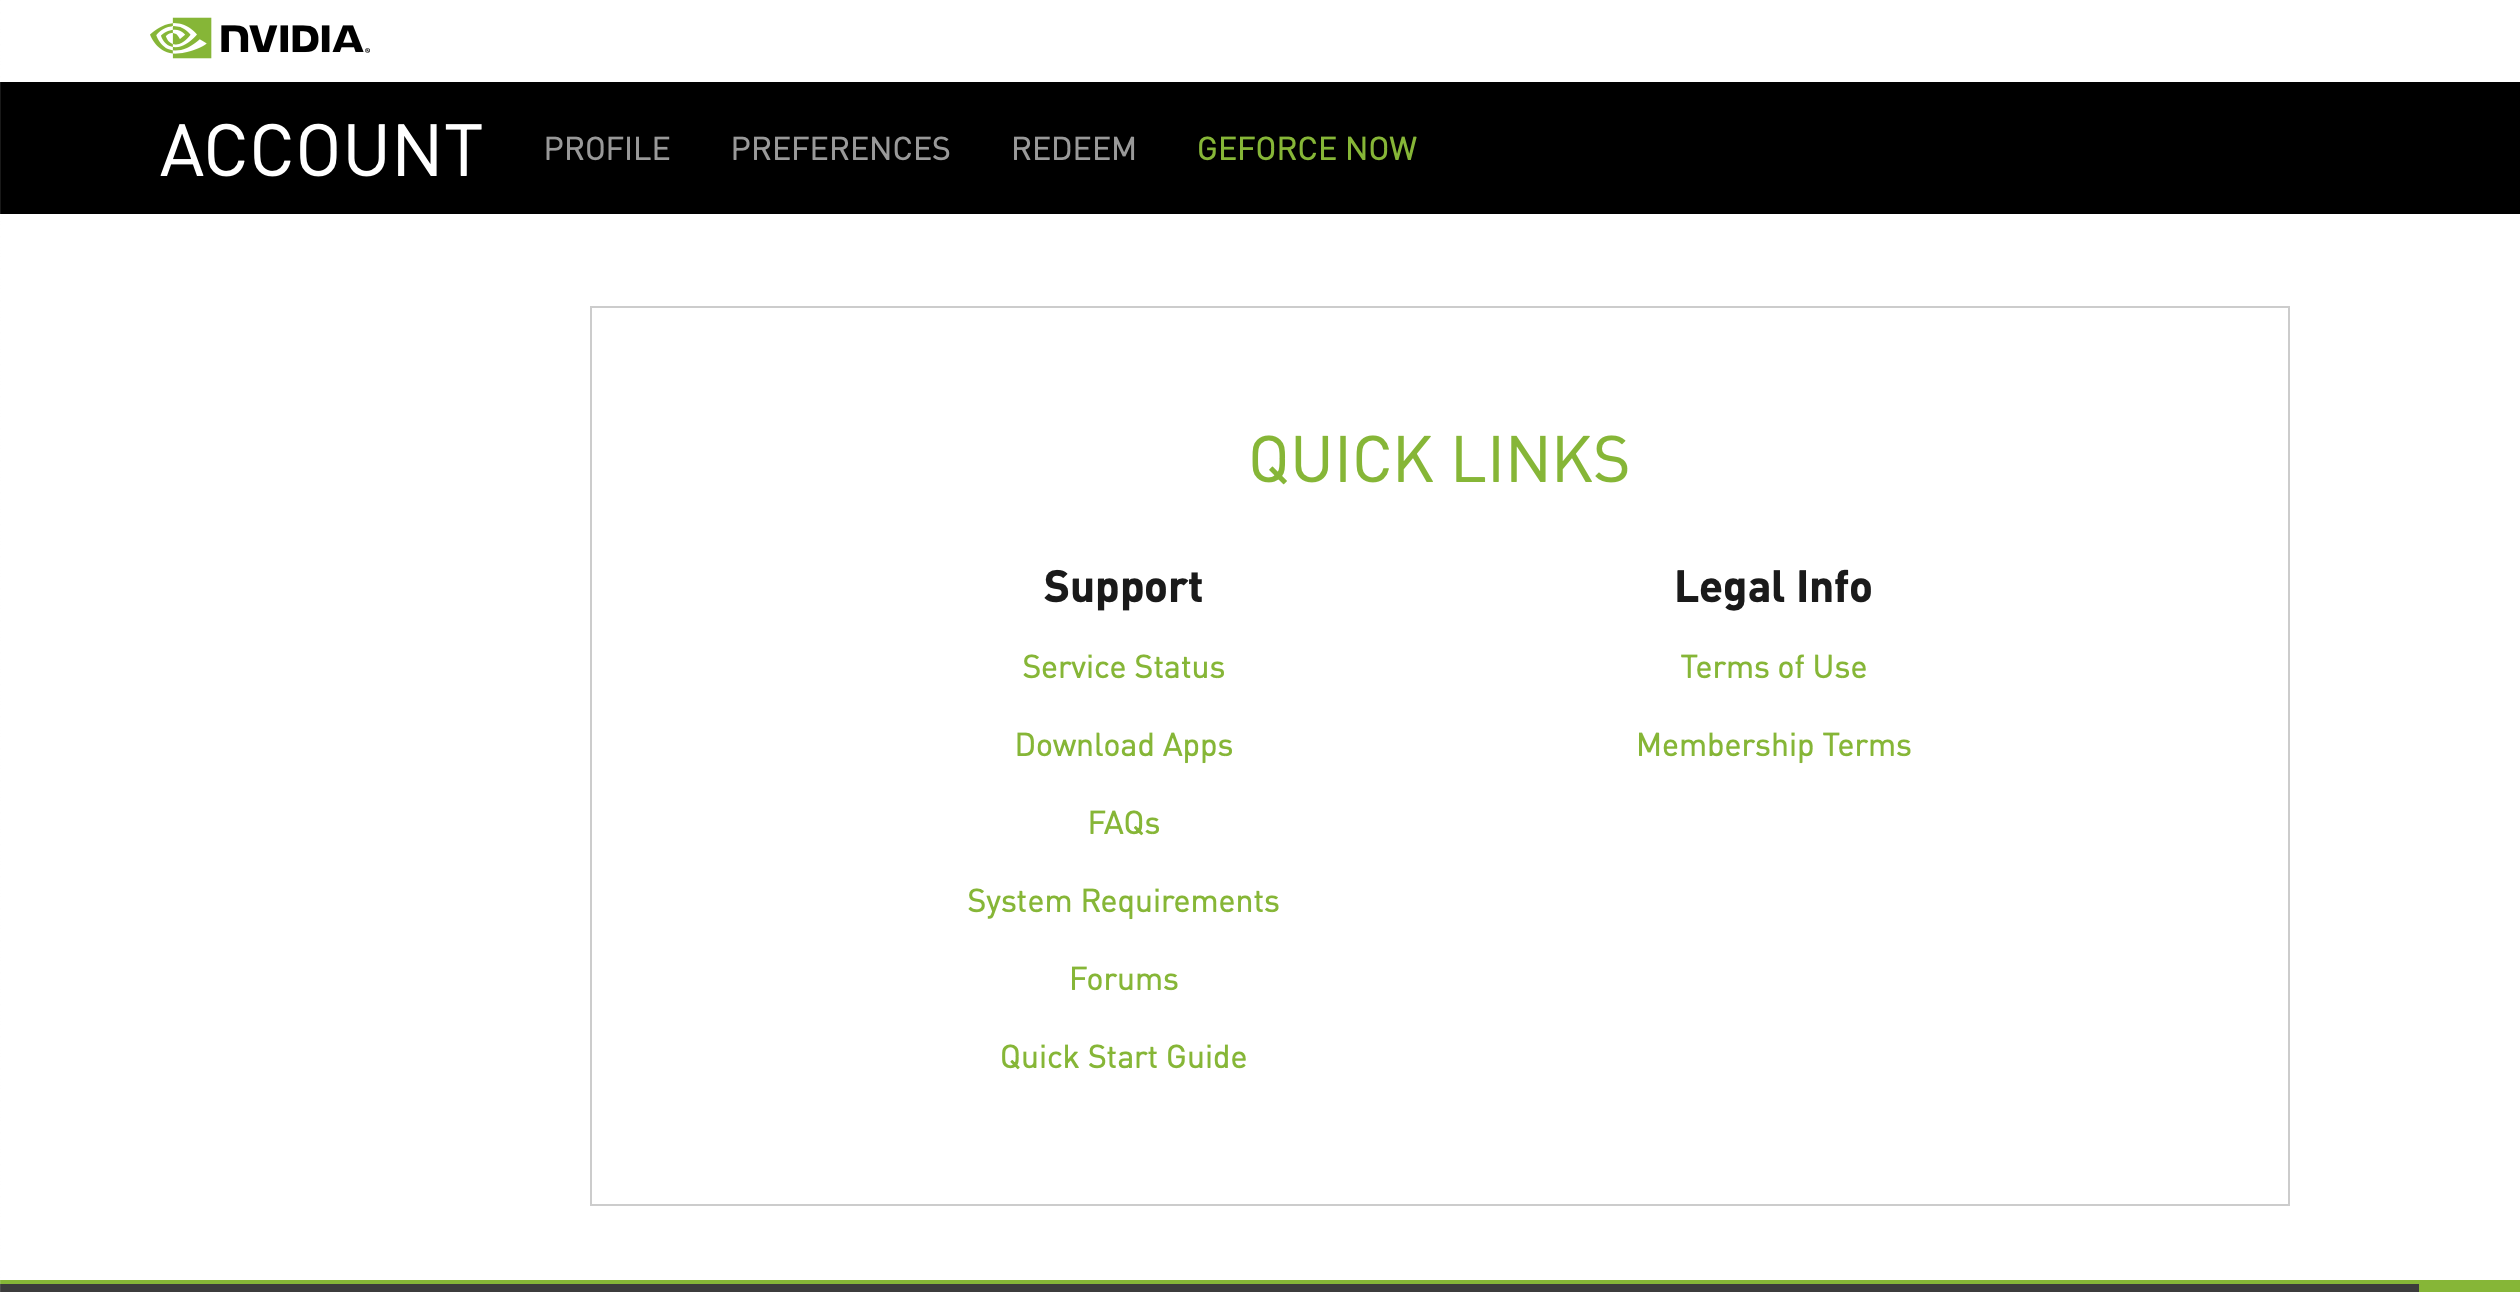
- Once in your account, whorl down a fleck and find and select the Download Apps button (nether Quick Links).
- At present download the Mac version of the GeForce Now client, open the downloaded file, and install the client past dragging the GeForce Now icon to the Applications binder icon.
- Once the client is installed, open the Applications folder and start the client app.
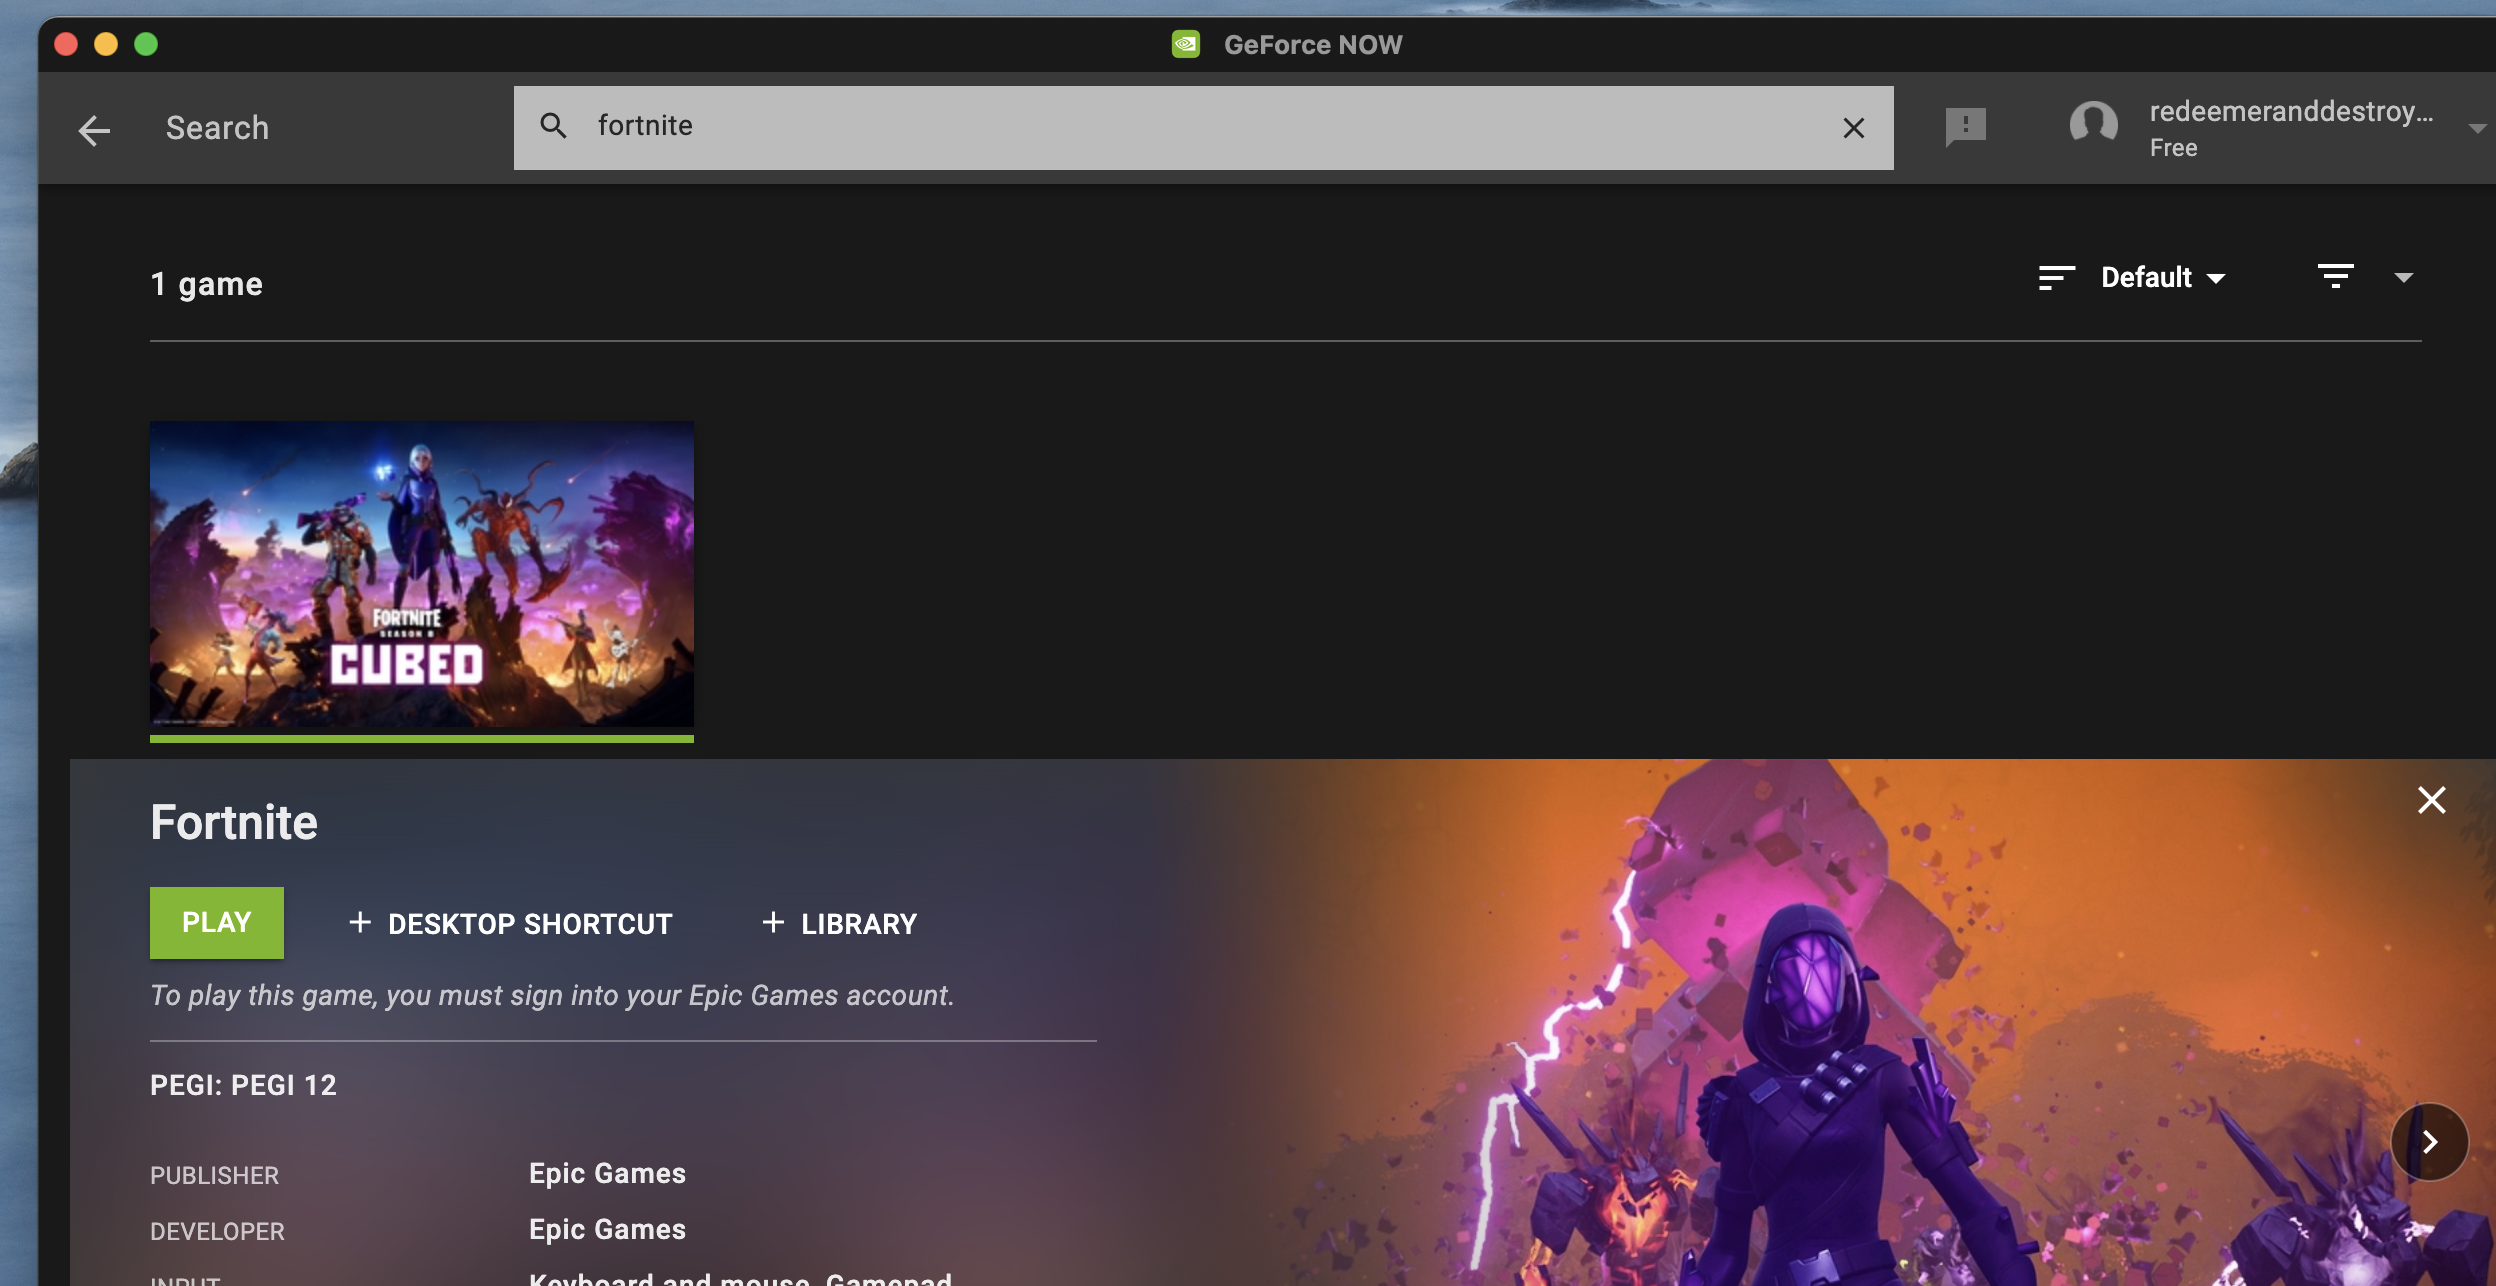
- Then log in with your GeForce Now account, and use the customer'due south search bar to search for Fortnite.
- Click on the Fortnite tile, then click Play, and select Continue when you are asked to sign in to your Epic Games account.
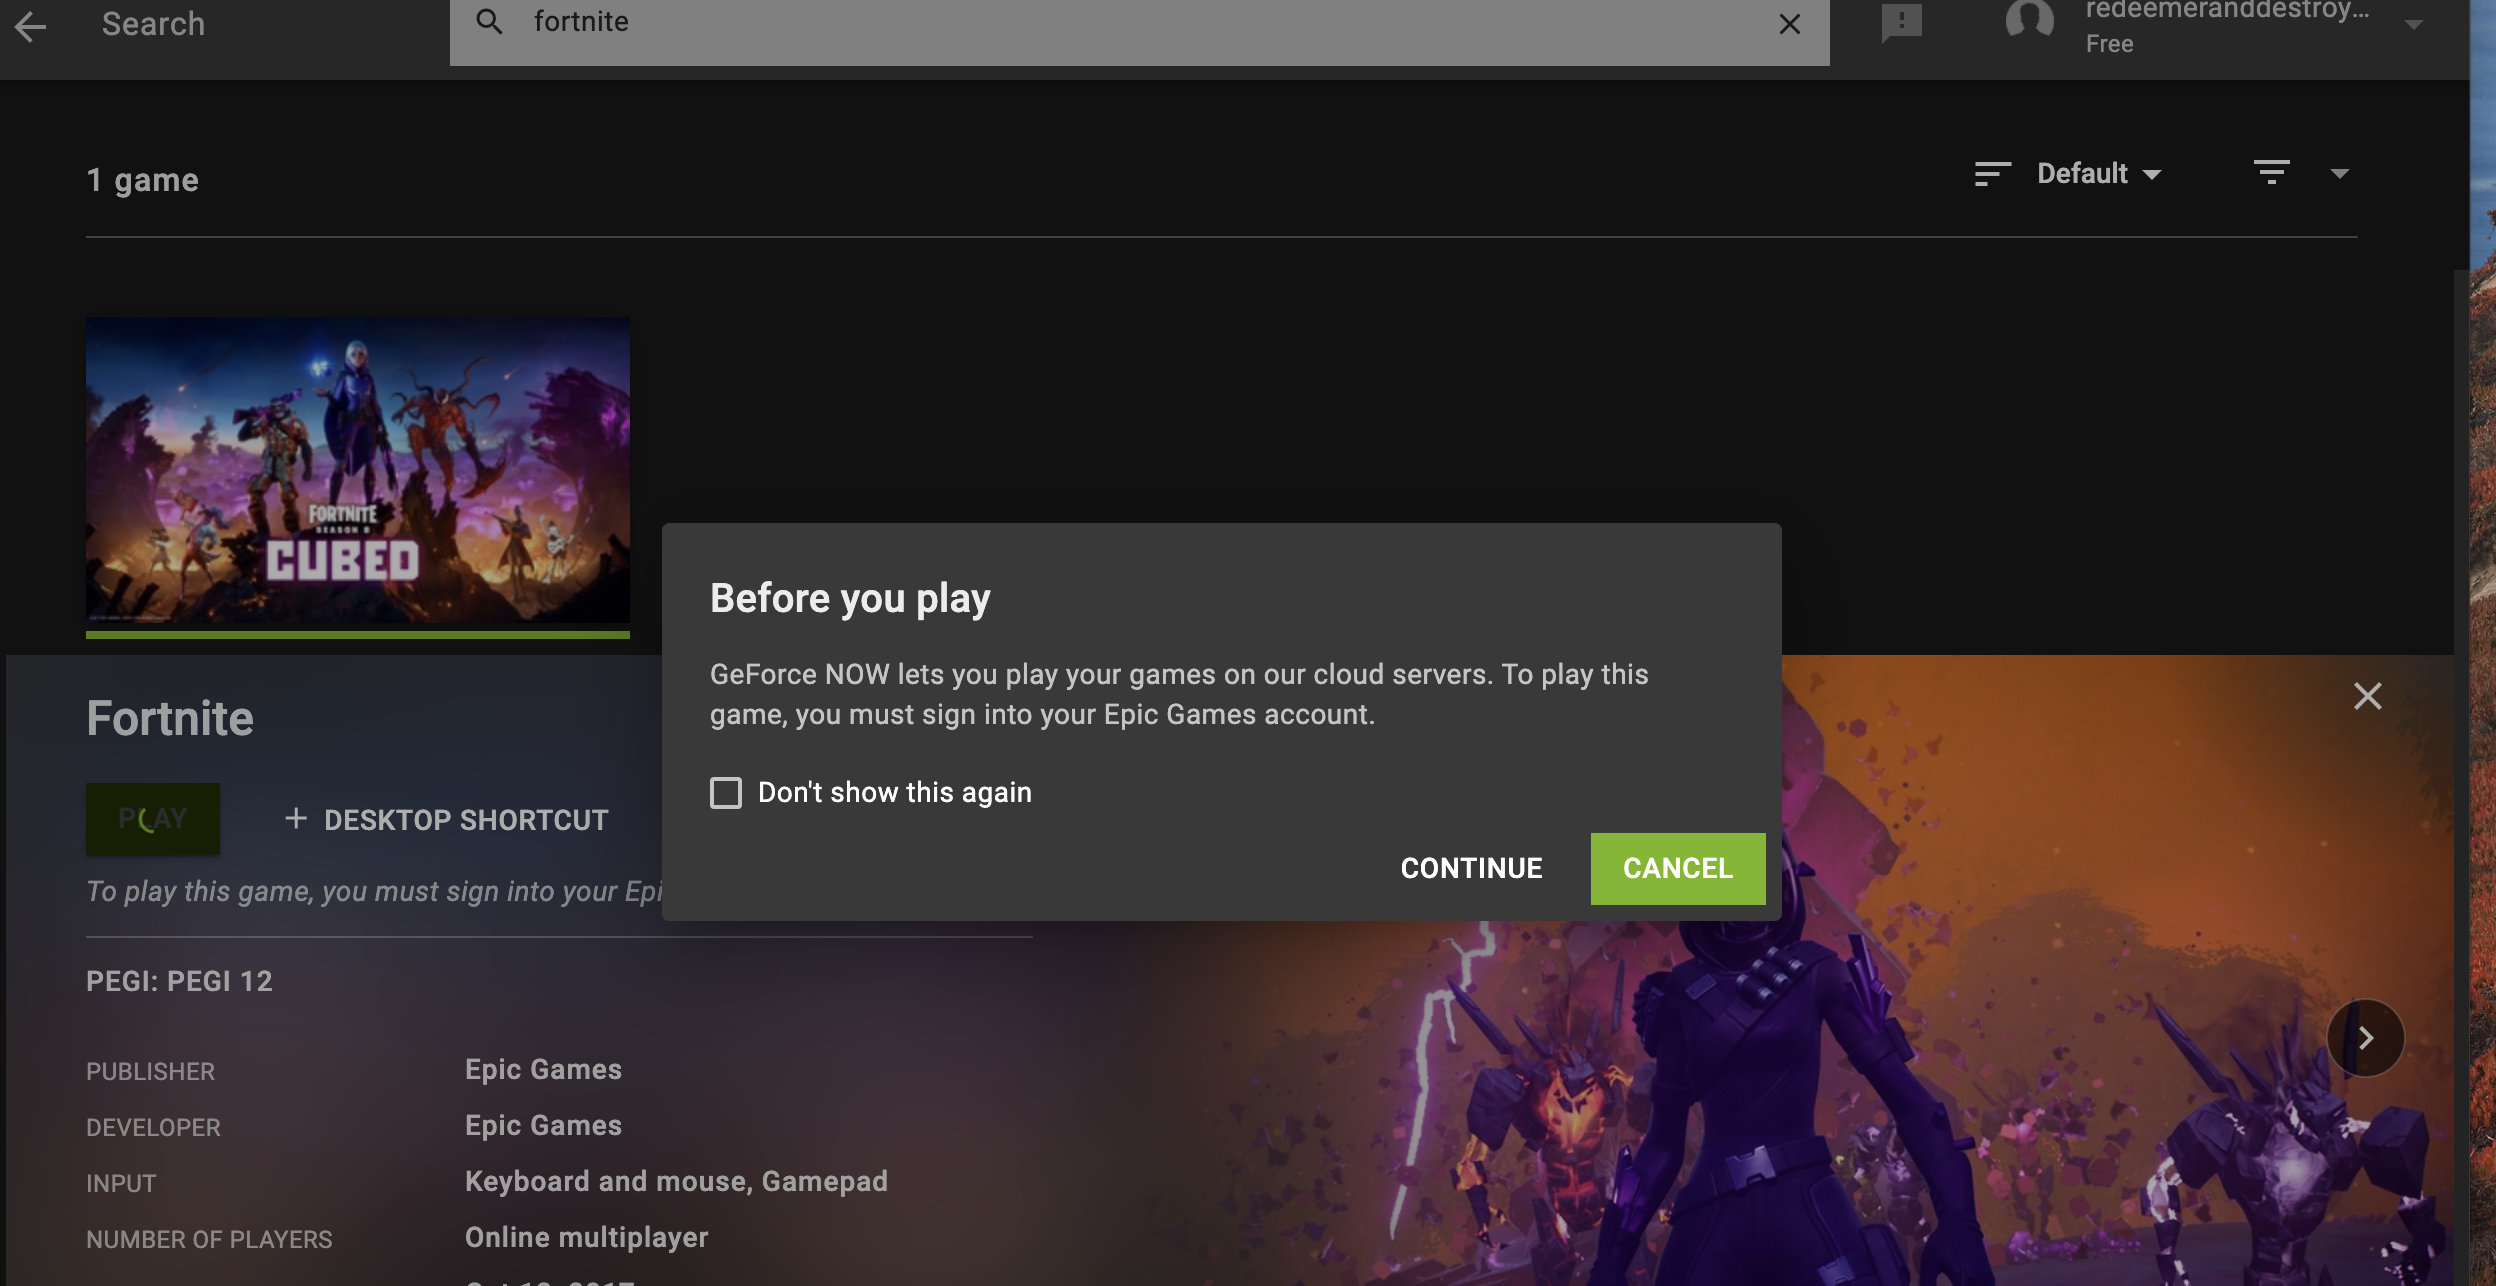
- You will be asked whether you'd like to connect your Ballsy Games account to GeForce Now in guild to get faster launch time. If you lot want to connect your Epic Games account, click Continue and log in to your Epic Games account. Yous can too select Not Now, as connecting your Epic Games account isn't really mandatory.

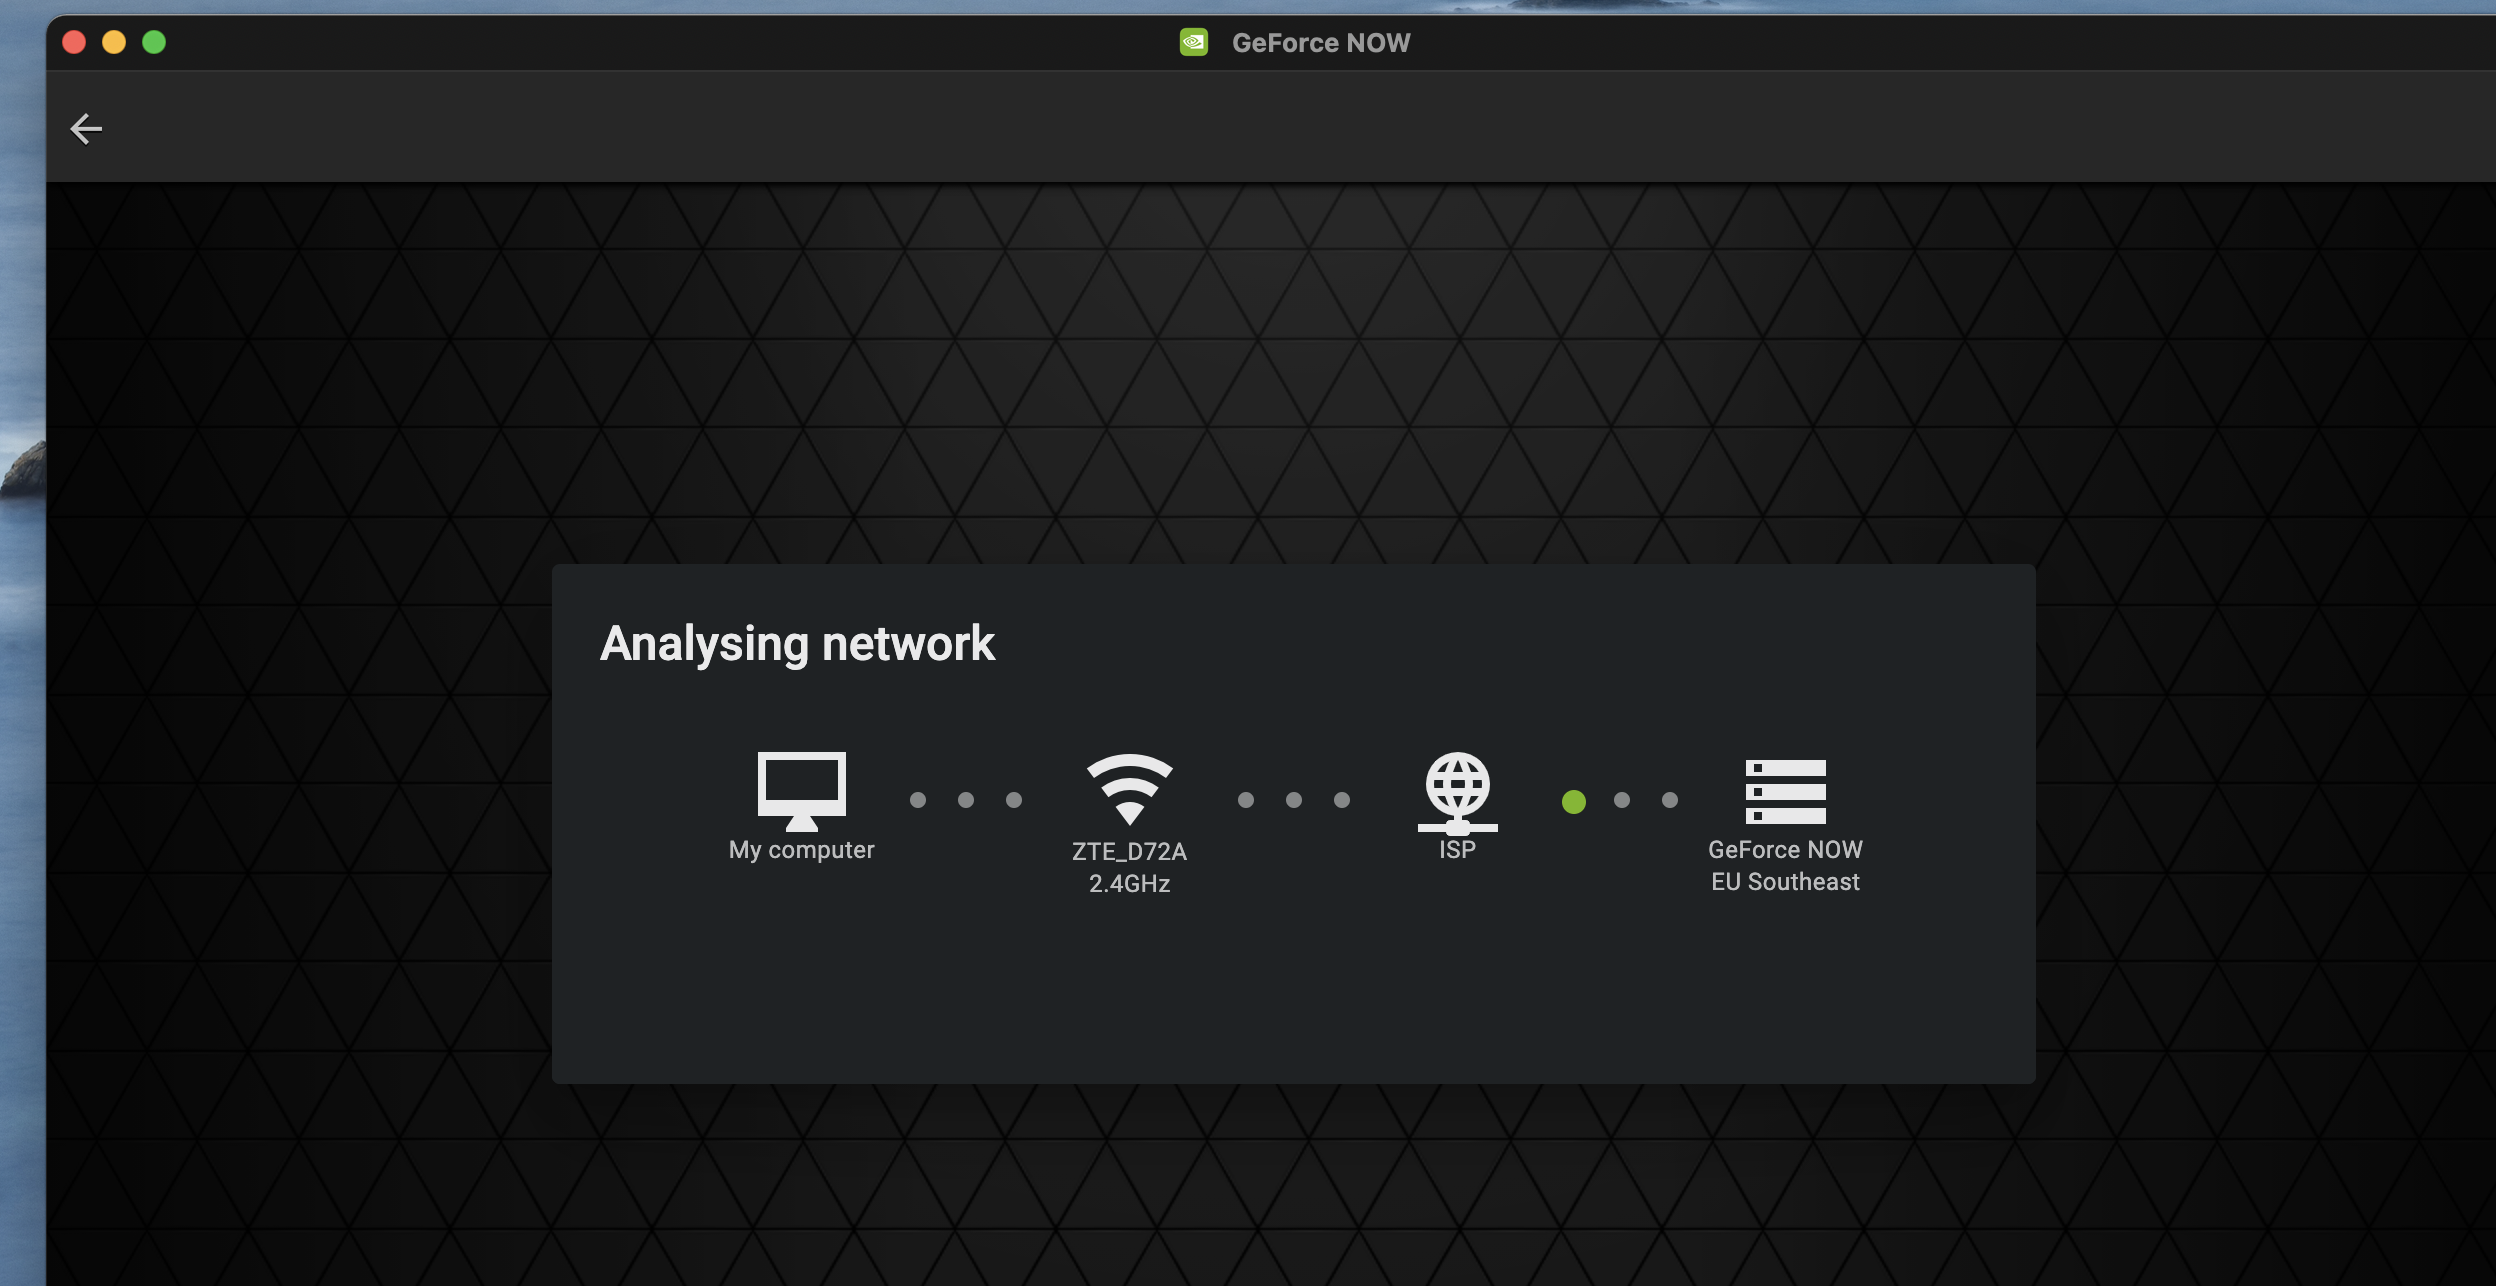
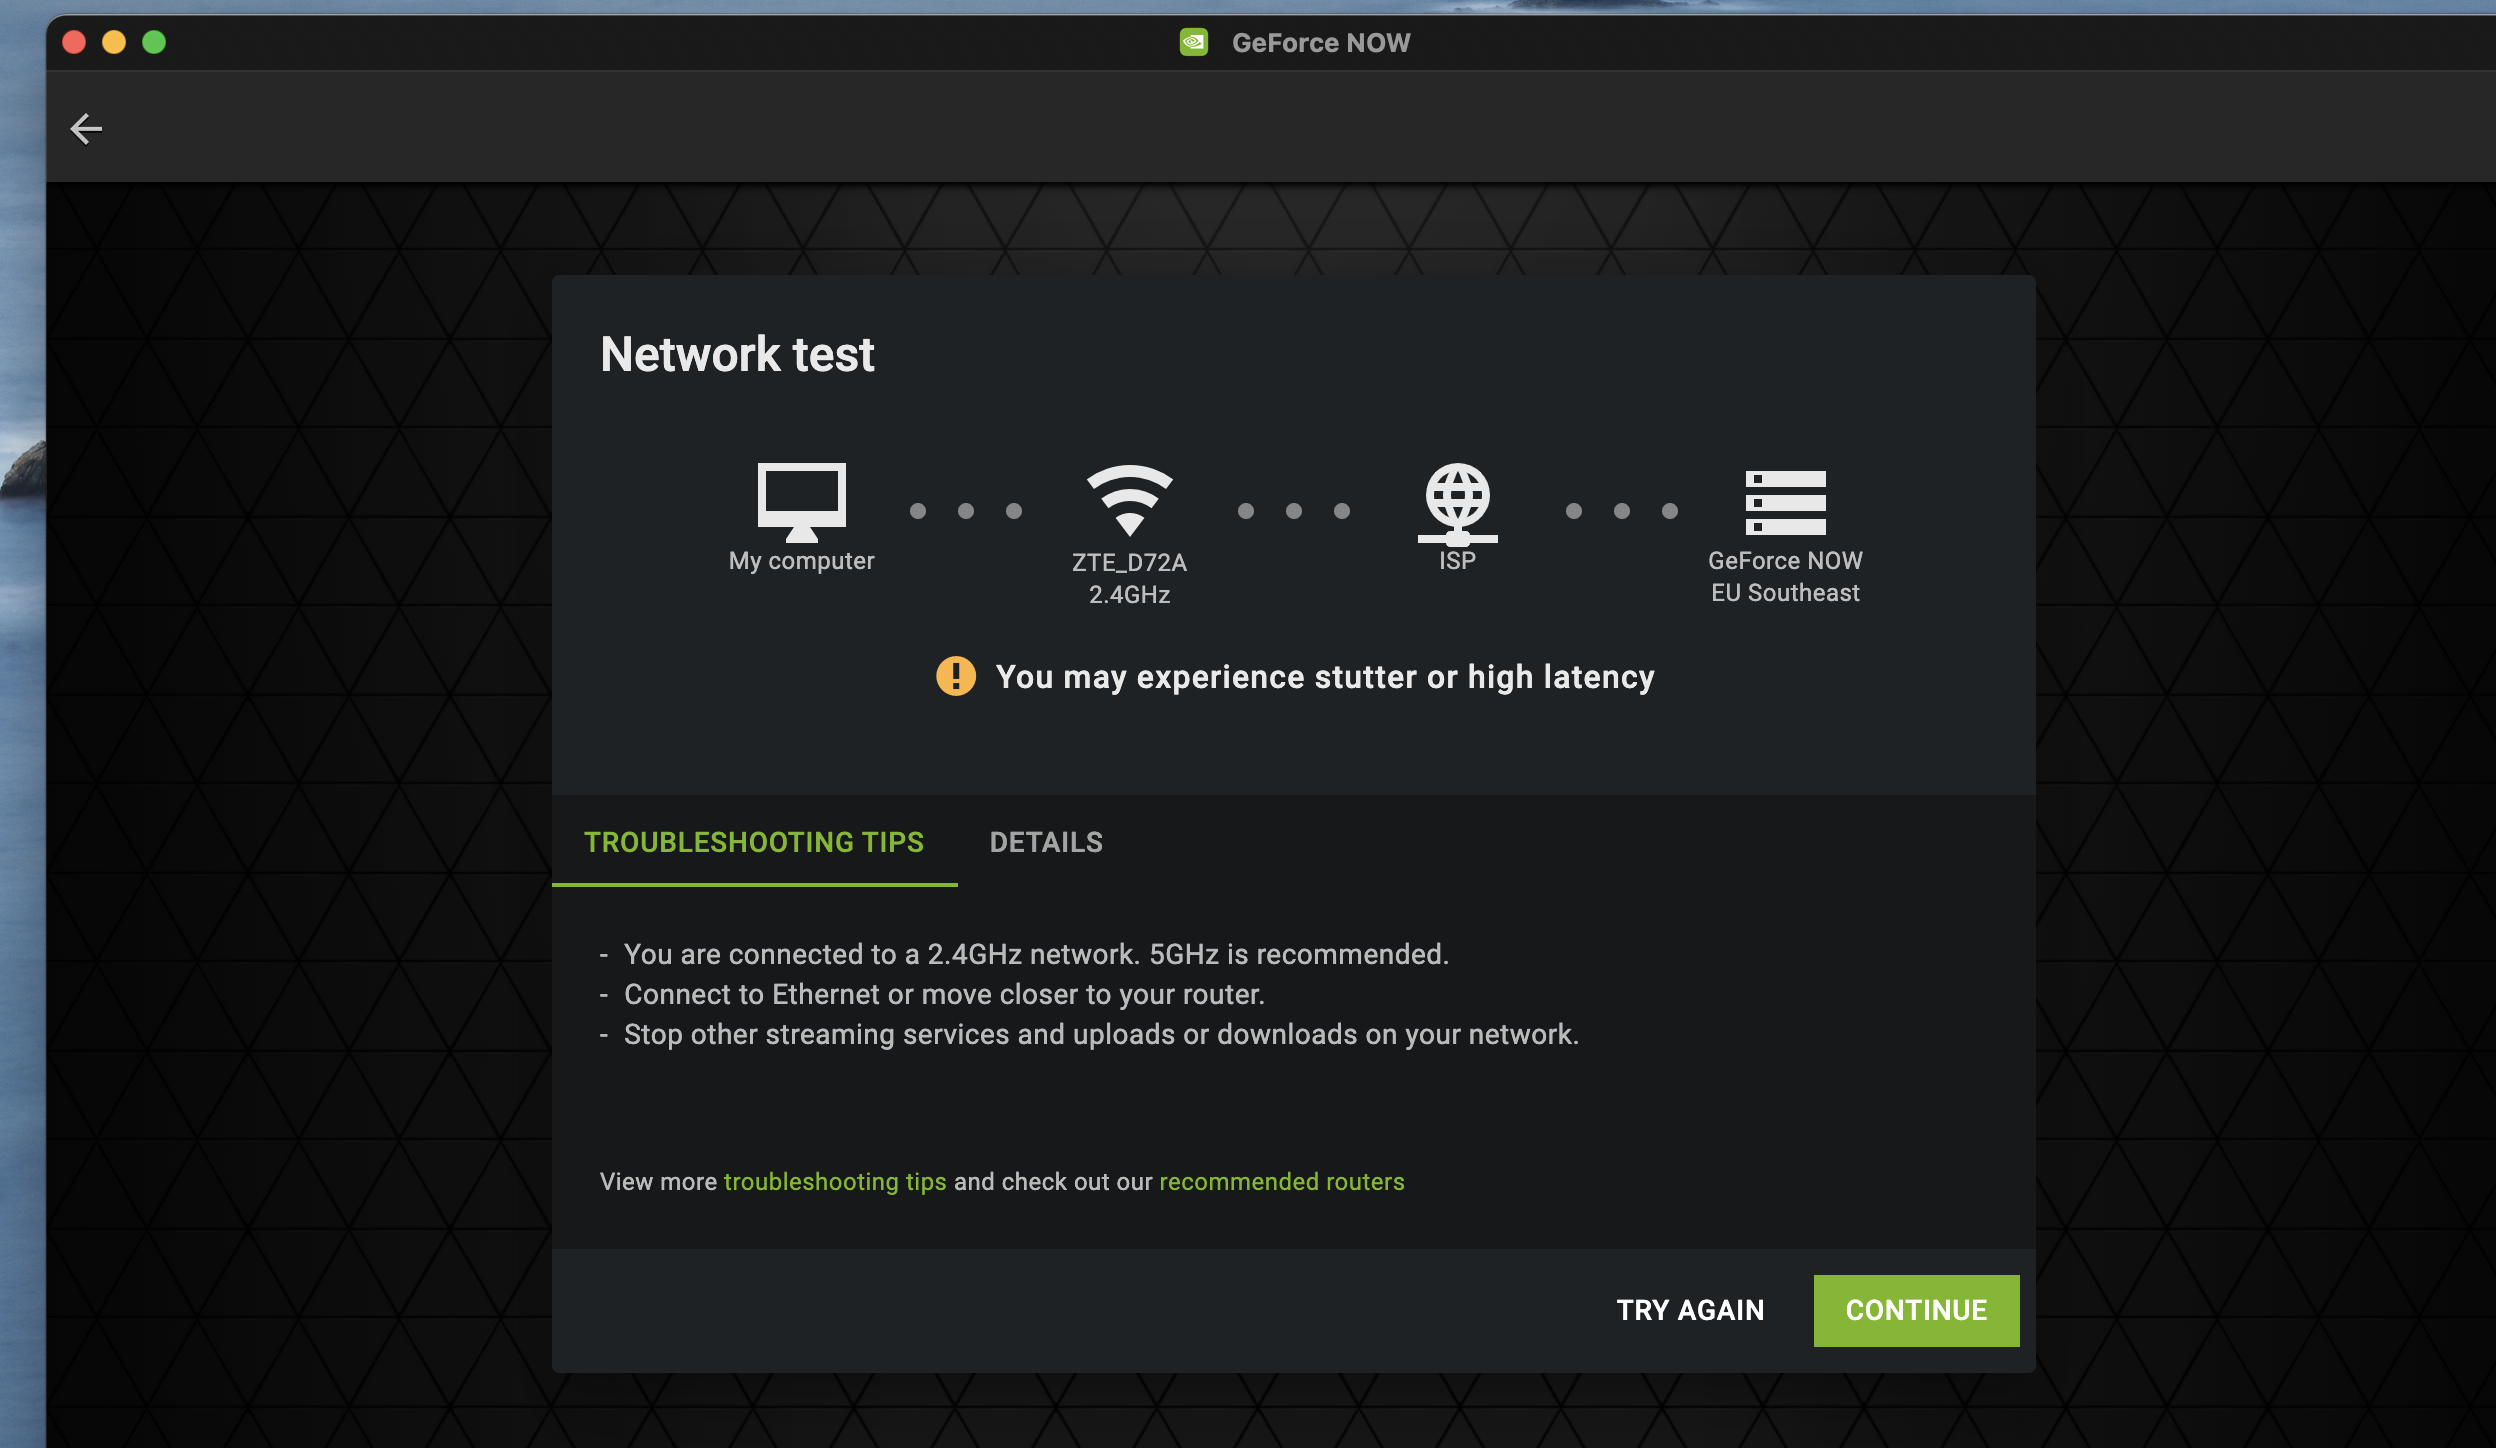
- Next, await for GeForce Now to analyse your network. If it tells yous that your connexion may not exist fast enough, y'all tin even so click Continue and try to play, but it'south possible that you may experience lag and performance issues.
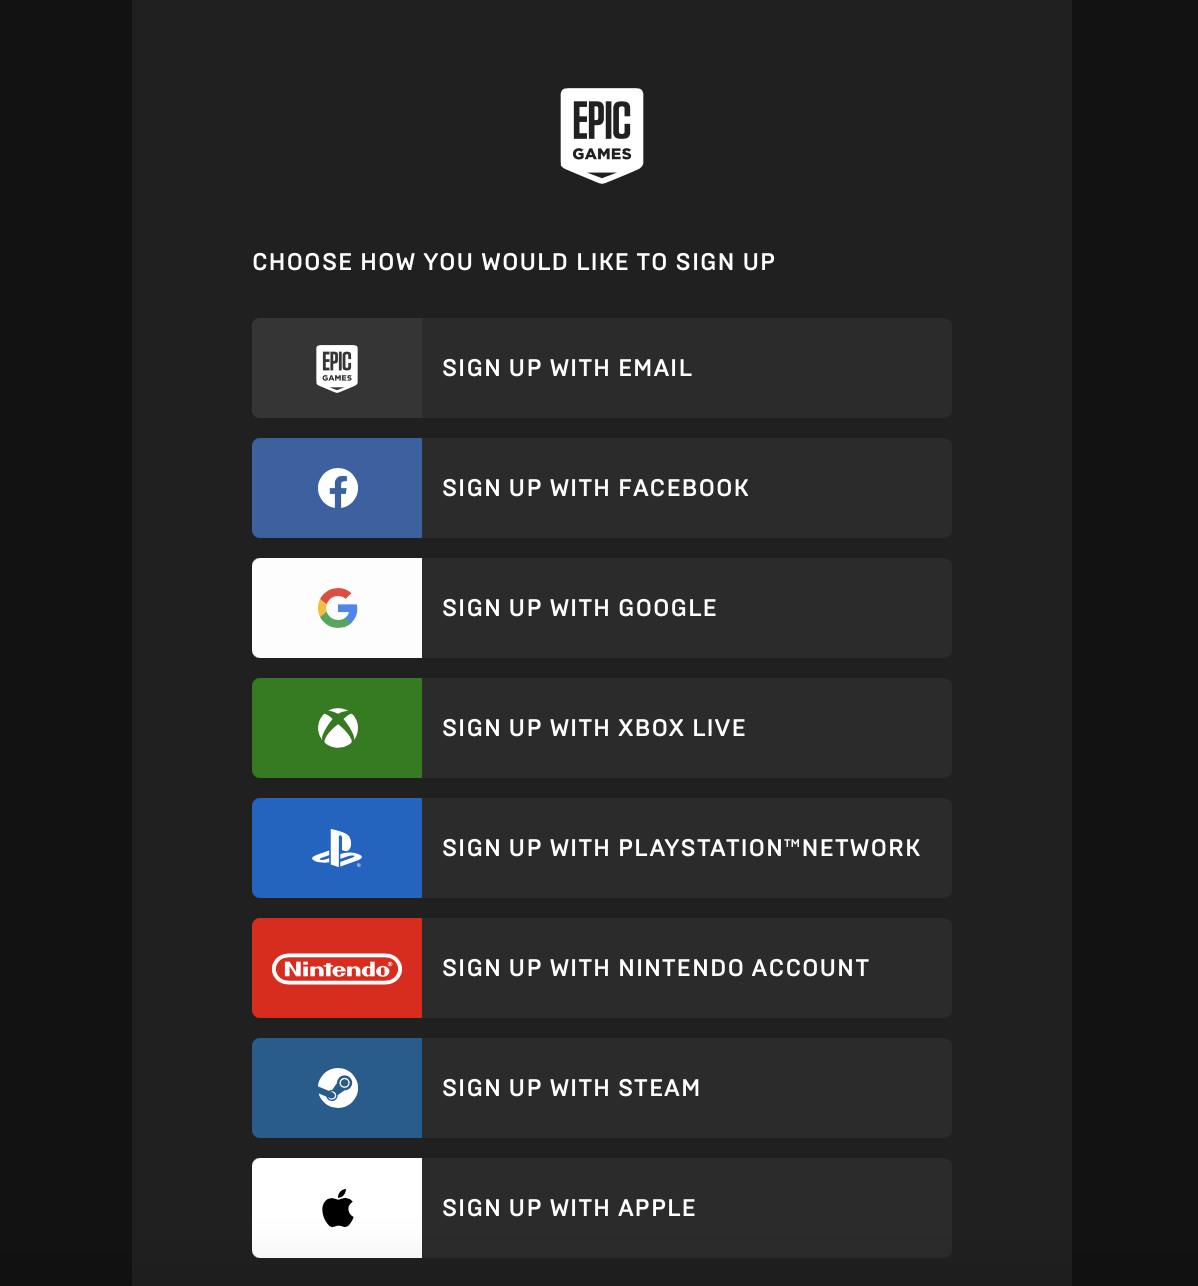
- After that, wait at the queue and once it's your turn, the game will launch. All that'southward left to do is to choose how to sign in to your Ballsy account – you can sign in with Epic Games, Google, Facebook, Step, Apple, and more. Choose the option you prefer, and later you sing in, you can starting time playing the game.

Play Fortnite using Kick Campsite
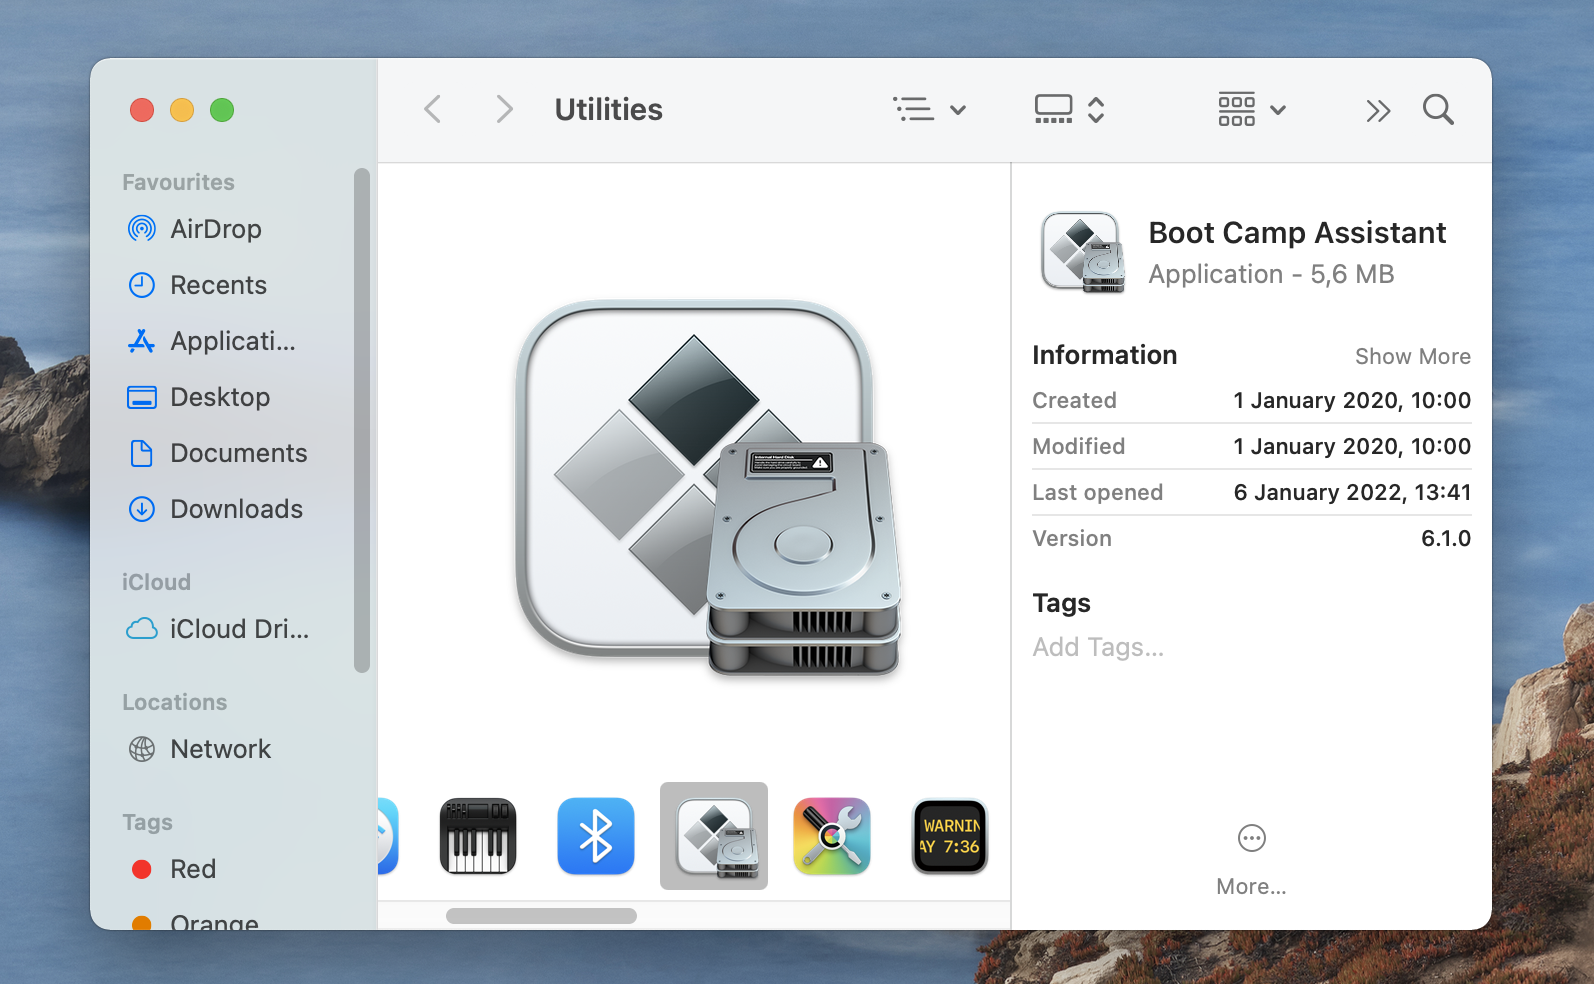
Intel Mac users can too install Windows on their Macs using the built-in Boot Campsite Banana tool (not available on M1 Macs).
The advantages of picking this method are mainly that it is costless and that it will permit yous all of your Mac's hardware resources such equally RAM and CPU cores when gaming in Windows. The latter is the near notable difference between the Parallels method and this one, because, as was said earlier, when using a Parallels VM, Windows and macOS need to share your Mac'due south resource, thus leaving less RAM and CPU for Windows. If y'all want to play Fortnite and your Mac only meets the minimum arrangement requirements for the game (or barely exceeds them), it would be better to try the Kicking Camp method, as the Parallels i might not let y'all play the game.
On the other hand, a big disadvantage of using the Kick Camp Assistant method (especially for gaming) is the amount of storage space that this would require. You will need at to the lowest degree 150 GB of free storage infinite but to install Windows (100 GB for the Windows sectionalization and 50 GB of free space that must be left on the macOS partitioning), and boosted infinite to arrange the games that you want to play. Well-nigh modern games take upwards of 50 GB space, and some get closer to 100 GB. In other words, if your Mac doesn't have a whole lot of infinite, this method may not be platonic.
Another downside of the Kick Army camp method is that it is the most fourth dimension-consuming one of all the methods shown on this page. In comparison, Parallels lets you get Windows on your Mac much quicker.
The concluding downside of this method is that it's non possible to apply it on M1 Macs, then if your Mac is with an M1 flake rather than an Intel processor, you will need to use one of the other methods as the Boot Campsite Assistant app won't be available for you.
Here's the entire installation procedure:
Tutorial Overview
- Downloading the Windows 10 ISO file
- Preparing for the Installation
- Starting the installation of Windows 10
- Customizing Windows 10 and installing necessary updates
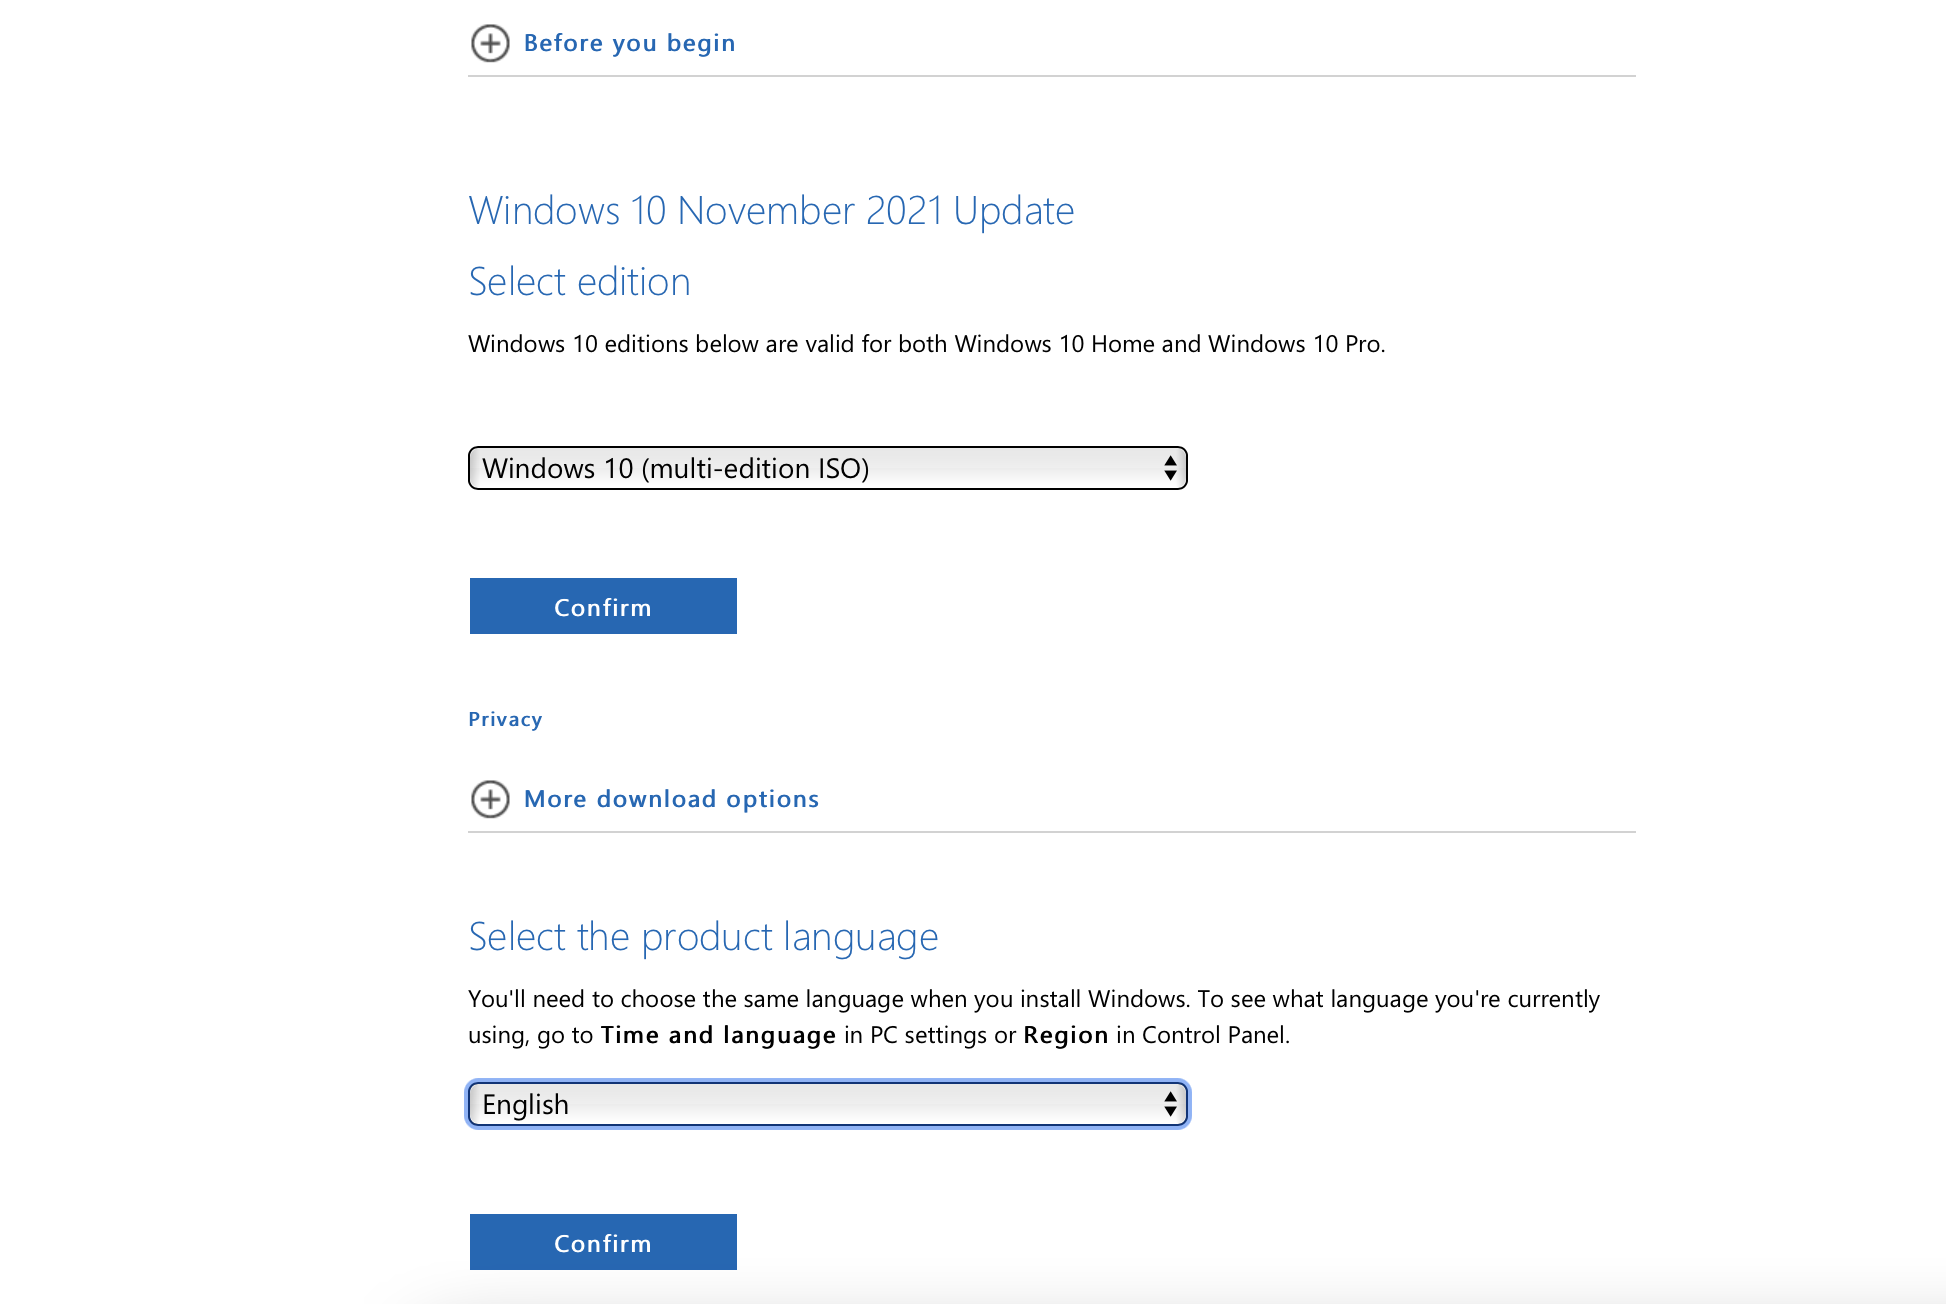
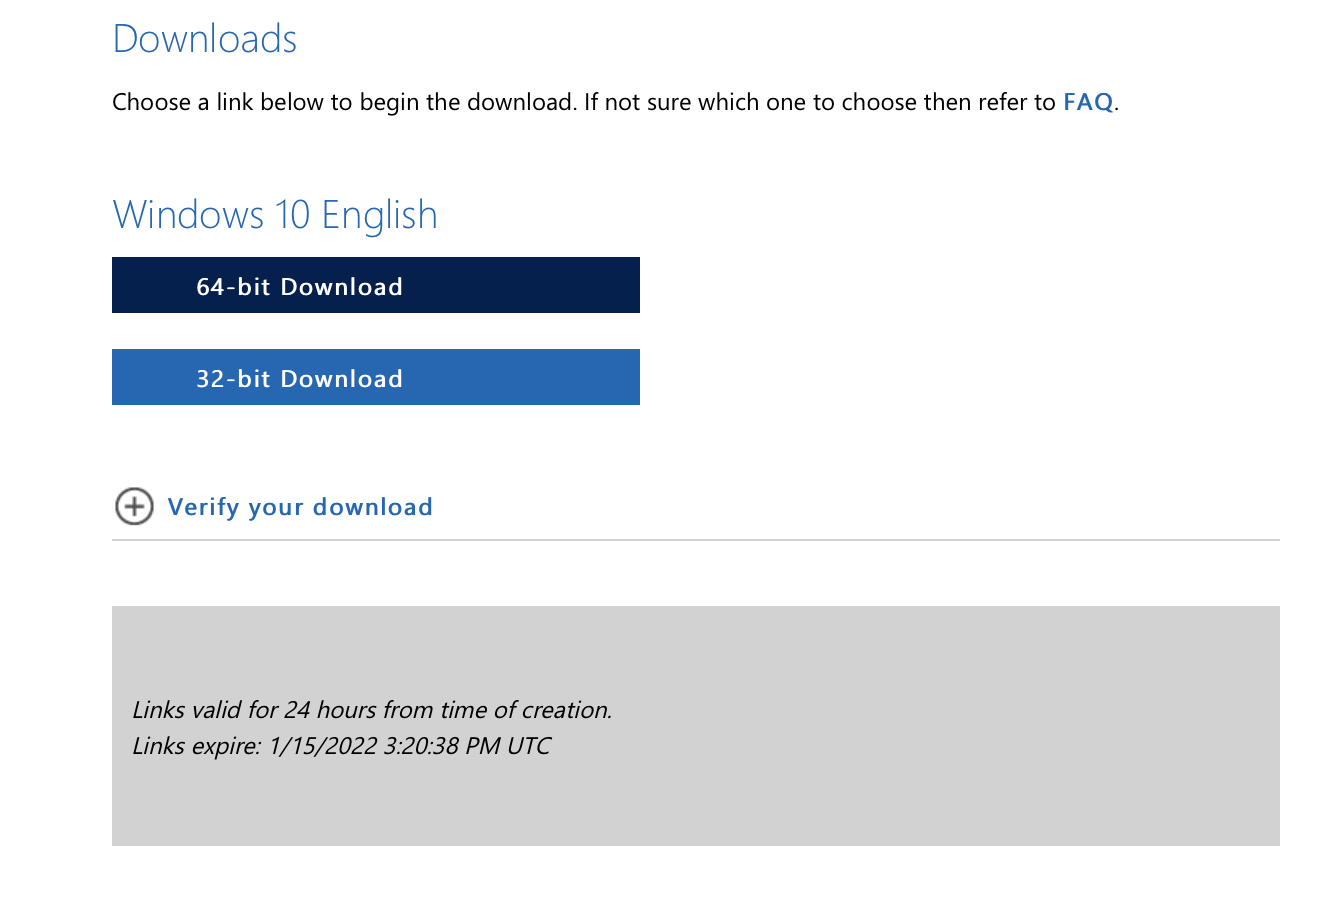
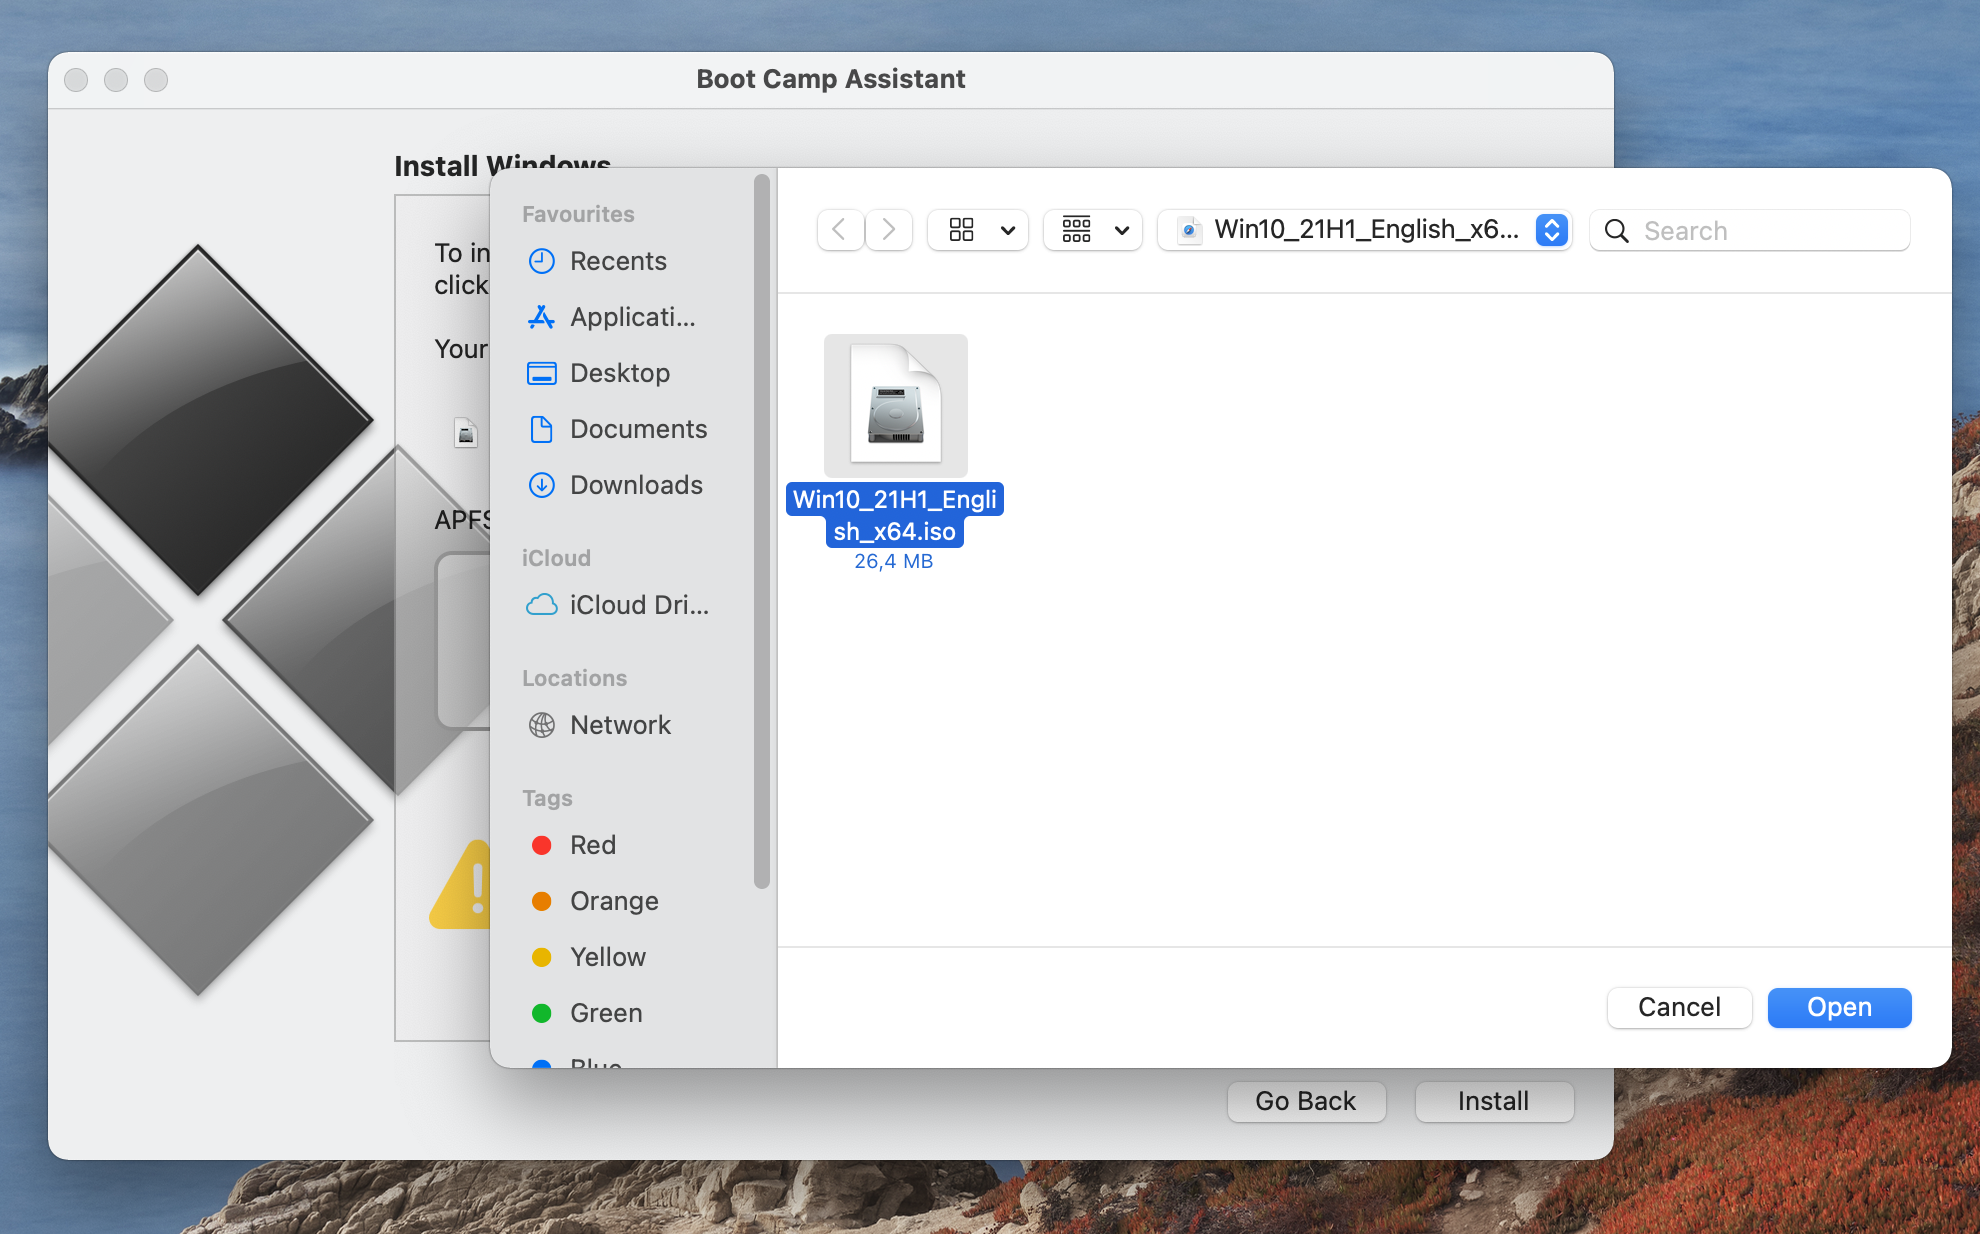
- You must start download a 64-bit Windows ISO file from this page, afterward choosing an edition and a language.
- Next, from Applications > Utilities on your Mac, start the Boot Campsite Banana app and click Continue.
- At present await for the file to download, then click Choose in the Boot Army camp Assistant, notice and select the file, and click Open.
- After that, give enough space to the Windows ten partition so that it can accommodate both the Windows Bone and Fortnite – yous should allocate at least 150 GB of infinite to Windows. However, be sure to go out at least 50 GB for the macOS partition and then that you don't go any performance bug when using it.

- When everything is gear up, click Install, wait for the initial loading process to terminate, provide your password when prompts, and click OK.
- When your Mac restarts, choice a language and location and select Next.
- If you have a product key, enter information technology on the next screen and if you don't, use the Skip (or I don't take a production cardinal) button, to move to the side by side screen.
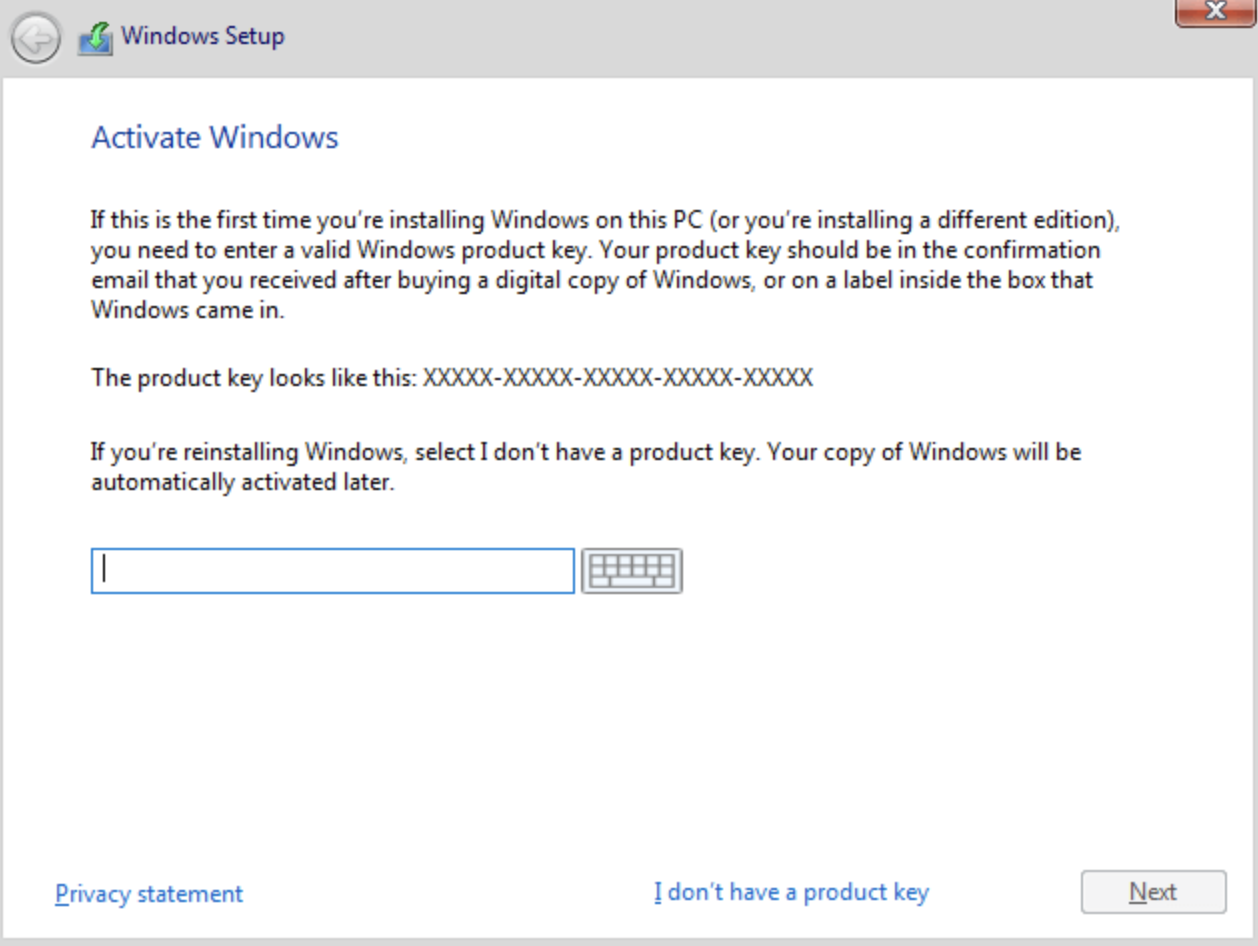
- If y'all don't accept a primal, you will next be asked to cull a preferred Windows edition. We recommend picking the Dwelling one, as the Pro edition isn't required for gaming.
- All that's left to do is to Agree to the Terms and Conditions and then click Next to launch the installation.
- After Windows installs and your Mac restarts once again, get through the customization of the Windows 10 settings, create a Windows 10 profile, and activate Cortana if you want to.
- Windows should now load, but there are a couple of things left to practice – beginning, follow the prompts in the Boot Camp Assistant window that should be open on your screen and allow the needed Apple drivers for Windows to be installed by providing your admin permission whenever information technology is required. Later that, your Mac must restart again.
- Lastly, perform the post-obit two update installations, restarting the computer afterward each:
- In the Windows Start Carte du jour, search for Apple Update, open it, and install any updates shown at that place.
- Open the Start Carte again, click on Settings, become to Update & Security > Windows Update, and install any updates shown to be pending.
After all of those steps are complete, your Mac should be ready to be used with Windows and you can move on to downloading and playing Fortnite from the Windows partition.